Author: Deep Raj

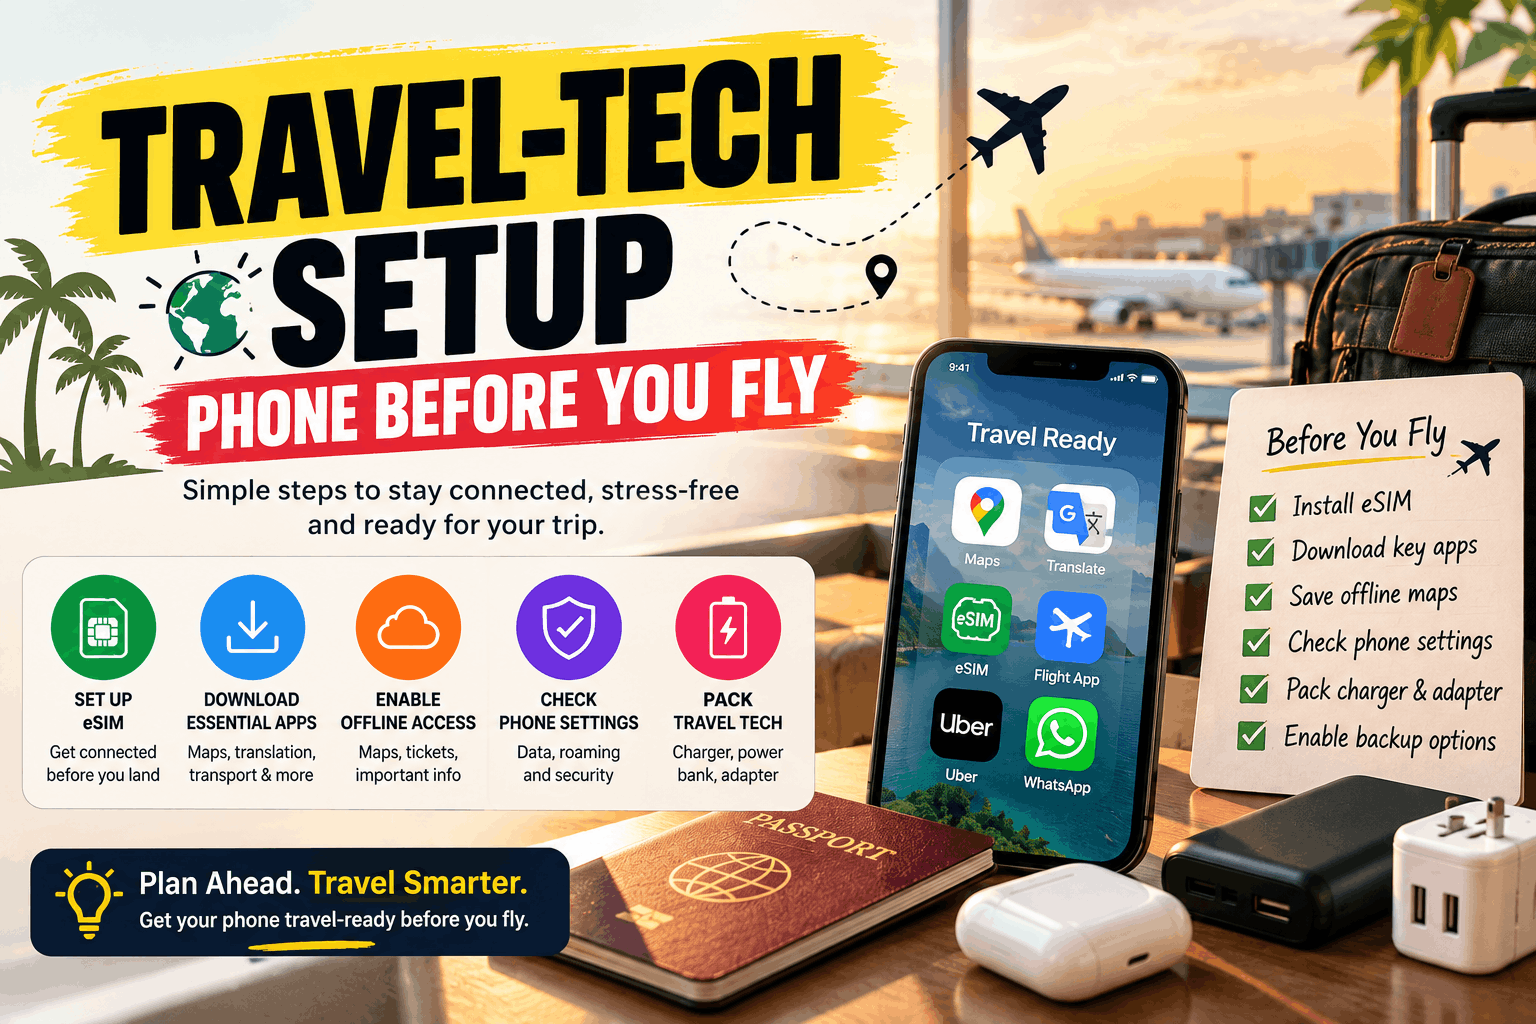
  • Travel Tech Setup: Everything to Do With Your Phone Before You Fly

    Travel Tech Setup: Everything to Do With Your Phone Before You Fly

    Think packing your bag is the last step before a trip? Your phone setup before international travel might be the most important thing you haven’t done yet. Here’s the complete 2026 checklist — from connectivity to security — so you land ready for anything.


    The modern traveler’s phone is a boarding pass, a map, a currency converter, a translator, a hotel key, a taxi dispatcher, and a lifeline home — all at once. And yet most people spend more time picking their carry-on than preparing the device that runs their entire trip.

    A proper phone setup before international travel takes under an hour. Done right, it saves you from roaming bill shock, dead batteries at the worst moment, locked banking apps in a foreign country, and the particular misery of standing on a street corner in an unfamiliar city with no data and no offline map.

    This guide walks through every step — connectivity, apps, security, battery, backups — in the order you should actually do them, with honest recommendations for Canadian travelers heading abroad in 2026.


    Step 1: Sort Your Connectivity First — Everything Else Depends on It

    The single most important part of your phone setup before international travel is deciding how you’ll get data when you land. Get this wrong and everything that depends on your phone — navigation, bookings, communication — is compromised from the moment you step off the plane.

    Understand What Your Canadian Carrier Actually Charges

    Before assuming your existing plan will “just work” abroad, check the actual numbers. Rogers, Bell, and Telus all charge CA$16–18 per day for international roaming — activated automatically the moment your phone connects to a foreign network, even if you only check one message.

    hidden costs of roaming on Rogers, Bell, and Telus

    For a 10-day trip, that’s CA$160–180 per device. For a family of four, nearly CA$700. For a couple on a 14-day Europe trip, over CA$500 — in phone bills alone.

    Set Up a Travel eSIM Before You Fly

    The smartest connectivity decision most Canadian travelers make is switching to a travel eSIM from SimClaire before their flight. An eSIM is a digital SIM card built into your phone — no physical swap, no losing your home number, no passport registration at an airport kiosk.

    Here’s how to set up your SimClaire travel eSIM:

    1. Check your phone is eSIM compatible at [INTERNAL LINK → simclaire.com/esim-compatible-devices] — anchor text: “SimClaire’s eSIM compatibility guide”
    2. Browse and purchase the right plan at simclaire.com — your QR code arrives by email in minutes
    3. Scan the QR code at Settings → Mobile Data → Add eSIM while on home Wi-Fi
    4. The eSIM installs in under 5 minutes and won’t activate until you land

    Do this at home — not at the airport. Installing your travel eSIM on home Wi-Fi means you land already connected, with no queue, no kiosk, and no day-rate billing clock running.

    why a travel eSIM beats roaming for Canadian travelers

    Turn Off Data Roaming on Your Home SIM

    Once your SimClaire eSIM is installed, disable data roaming on your Rogers, Bell, or Telus SIM to prevent any accidental background charges:

    • iPhone: Settings → Mobile Data → Mobile Data Options → Data Roaming → Off
    • Android/Samsung: Settings → Connections → Mobile Networks → Data Roaming → Off

    Your home SIM stays active for calls and texts. Your SimClaire eSIM handles data. Both run simultaneously on dual-SIM devices — your Canadian number stays reachable, and your data bill is under control.


    Step 2: Check Your Phone’s Physical and Software Readiness

    Connectivity sorted — now make sure the device itself is ready for the trip.

    Update Your Operating System

    Update your operating system to the latest versions to access the most stable network protocols. These versions include critical security patches and improved power management.

    Do this at home on Wi-Fi, not at the gate. A major OS update can take 20–40 minutes and drain significant battery — neither of which you want to manage on travel day.

    Check Battery Health

    Check your battery health in your device settings. If your maximum capacity is below 80%, consider a replacement before you leave. A failing battery is a major liability when you rely on digital maps in a new city.

    • iPhone: Settings → Battery → Battery Health & Charging
    • Android: Settings → Battery → Battery Health (or use an app like AccuBattery)

    Check Your Phone Is Carrier Unlocked

    A carrier-locked phone refuses any SIM or eSIM that is not from your home carrier. Phones bought outright are usually unlocked; phones on installment plans often are not. Check in settings — iPhone: Settings → General → About → Carrier Lock should say “No SIM restrictions” — and if it is locked, request an unlock from your carrier. It can take a few days, so do this first.

    This step is essential for eSIM setup. If your phone is locked to Rogers, Bell, or Telus, the SimClaire eSIM won’t install until the unlock is complete. Most carriers process unlock requests within 24–72 hours — do it early.

    Clean Your Charging Port

    Clean your charging port using compressed air or a non-metallic pick. Compressed pocket lint is the leading cause of charging failure during international transit.

    This is the unglamorous fix that saves more trips than any app.


    Step 3: Download the Apps That Actually Matter

    Most “must-have travel app” lists recommend 30+ apps. In practice, you need about eight. Here are the ones that earn their storage space — and the specific settings to configure before you fly.

    Navigation

    Google Maps — Google Maps remains the single most essential travel navigation tool. Download offline maps for every city on your itinerary while on home Wi-Fi. Offline maps remain accessible for up to 30 days and support turn-by-turn navigation without any data connection.

    how to download offline Google Maps areas before you travel

    MAPS.ME — A strong backup navigation app using OpenStreetMap data, with offline maps, searchable points of interest, and turn-by-turn routing. Particularly useful in rural areas where Google Maps coverage is thinner.

    Translation

    Google Translate — Google Translate remains the definitive baseline for travel translation in 2026. It supports 249 languages with live audio translation in at least 70 of them.Download the offline language packs for your destination before you fly — camera translation (point your phone at a menu or sign) also works offline once the pack is installed.

    Download Google Translate language packs before your trip

    Money

    Wise (formerly TransferWise) — Wise offers the real mid-market exchange rate with minimal transparent fees across 50+ currencies. Traditional bank cards typically charge 3–5% on foreign transactions; Wise typically charges 0.5–1.5%.Set up your Wise account and card before you fly — delivery takes a few days.

    XE Currency — Offline exchange rate converter. Download it and update the rates on home Wi-Fi before you fly so you have current rates without data.

    Communication

    WhatsApp — The global standard for international messaging and calls over data. Every tour operator, villa host, and local contact you’ll interact with abroad uses WhatsApp. Make sure it’s updated and your backup codes are saved.

    If you’re using a SimClaire travel eSIM, WhatsApp runs over your eSIM data connection exactly as it does at home — no configuration needed.

    Itinerary Management

    TripIt — TripIt stores all your travel reservations and booking confirmations offline, making them accessible anytime.Forward your confirmation emails to [email protected] and it builds a master itinerary automatically, accessible without data.

    Safety

    Find My (iPhone) / Find My Device (Android) — Enable this before you fly and verify your device appears correctly in your account. Activate device location and verify on the provider’s website that the device appears correctly associated with the account. Enable remote lock and wipe functions, allowing you to protect your data if the device is lost.

    How to enable Find My on iPhone before traveling

    Step 4: Secure Your Phone for International Use

    Security settings that don’t matter at home become critical when you’re on unfamiliar networks in unfamiliar cities.

    Enable a Strong Lock Screen

    Set a 6-digit PIN or alphanumeric passcode — not just Face ID or fingerprint, which can be compelled in some jurisdictions. Make sure your lock screen auto-locks after 30 seconds or less.

    Audit Your Two-Factor Authentication

    This is the step most travelers skip until it bites them.

    If your banking, email, or work accounts use SMS-based two-factor authentication (a code texted to your phone number), those codes go to your Canadian number — which stays active on your home SIM even while you’re abroad. On a dual-SIM setup with a SimClaire eSIM, this works seamlessly because your home SIM remains active for texts and calls.

    If you’ve physically swapped out your home SIM for a local one, those 2FA codes are unreachable. This is one of the most overlooked reasons to use an eSIM rather than a physical SIM swap abroad.

    how a travel eSIM keeps your two-factor authentication working abroad

    Back Up Everything Before You Fly

    • iPhone: Settings → Apple ID → iCloud → iCloud Backup → Back Up Now
    • Android: Settings → Google → Backup → Back Up Now

    Do this on home Wi-Fi the night before your flight. If your phone is lost, damaged, or stolen abroad, a recent backup means a replacement device can be fully restored.

    Save Emergency Contacts Offline

    Screenshot or write down: your travel insurance policy number and emergency line, your bank’s international fraud number, your hotel’s address and phone number, and your emergency contact at home. If your phone dies or is stolen, these should be accessible without it.


    Step 5: Download Your Documents and Boarding Passes

    In 2026, the mobile phone has become the traveler’s main tool: it contains airline tickets, hotel confirmations, boarding passes, vaccination certificates, payment methods, loyalty cards, and confidential personal data.

    Before your phone setup before international travel is complete, make sure everything you’ll need in the first 24 hours of your trip is accessible offline:

    • Boarding passes → Download to Apple Wallet or Google Wallet while on home Wi-Fi. Screenshot as a backup.
    • Hotel confirmation → Save the address, check-in time, and confirmation number in TripIt or your Notes app
    • Travel insurance details → Screenshot your policy number and emergency contact line
    • Destination entry requirements → Check ETIAS (for Europe), ETA (for UK), or any visa requirements and screenshot your approval

    Check the Government of Canada’s travel advisories for your destination before you fly

    Step 6: Configure Battery and Data Management

    Turn Off Background App Refresh

    Background App Refresh lets apps update content while you’re not using them — which is fine at home and potentially expensive abroad if your home SIM’s roaming is still active.

    • iPhone: Settings → General → Background App Refresh → Off (or select specific apps)
    • Android: Settings → Network & Internet → Data Usage → Background Data → Restrict

    Disable Automatic App and OS Updates

    Set your phone to update on Wi-Fi only. Abroad, an unexpected system update over mobile data can consume gigabytes in minutes.

    • iPhone: Settings → App Store → Automatic Downloads → toggle off App Updates
    • Android: Play Store → Settings → Network Preferences → Auto-update apps → Over Wi-Fi only

    Turn Off Wi-Fi Assist / Adaptive Wi-Fi

    Wi-Fi Assist automatically switches you to roaming data if the local Wi-Fi signal is weak. Abroad, this means your phone might jump onto a roaming network without warning.

    • iPhone: Settings → Mobile Data → scroll to bottom → Wi-Fi Assist → Off
    • Android: Settings → Connections → Wi-Fi → Advanced → Switch to Mobile Data → Off

    If you’re using a SimClaire travel eSIM as your data line, this is less of a concern — but it’s still worth disabling to prevent your home SIM from connecting to roaming networks unexpectedly.

    Pack a Power Bank

    The most underrated piece of travel tech. A 10,000mAh power bank gives your phone 2–3 full charges — enough for a long travel day without access to a plug. Check airline carry-on rules for battery capacity before you pack.


    The Complete Pre-Flight Phone Checklist

    Use this as your go-to checklist in the 48 hours before every international departure:

    48 Hours Before

    • Check your phone is eSIM compatible
    • Confirm your phone is carrier unlocked
    • Purchase your SimClaire travel eSIM plan
    • Install eSIM via QR code on home Wi-Fi
    • Update operating system and all apps
    • Check battery health (replace if under 80%)
    • Back up phone to iCloud or Google

    24 Hours Before

    • Turn off Data Roaming on home SIM
    • Turn off Background App Refresh
    • Turn off Automatic App Updates (Wi-Fi only)
    • Turn off Wi-Fi Assist / Adaptive Wi-Fi
    • Download offline Google Maps for every destination
    • Download Google Translate language packs for your destination
    • Download boarding passes to Wallet
    • Save hotel address, confirmation, and local emergency numbers offline
    • Update XE Currency exchange rates on home Wi-Fi
    • Enable Find My / Find My Device

    At the Gate

    • Switch to airplane mode for the flight
    • Confirm SimClaire eSIM is showing in your SIM settings
    • Power bank charged and in carry-on

    When You Land

    • Turn off airplane mode
    • Confirm SimClaire eSIM connects automatically ✅
    • Verify Data Roaming is still off on home SIM
    • You’re connected. Walk to baggage claim. Trip starts now.

    How SimClaire Fits Into Your Pre-Flight Setup

    Every step of this guide leads back to one decision that determines how smoothly everything else works: how you’ll get data when you land.

    If you land without a data plan, your offline maps are a safety net, not a strategy. If you land on Rogers or Bell roaming at CA$16–18/day, your trip is CA$160+ more expensive than it needs to be. If you land with a SimClaire travel eSIM already installed, you walk off the plane connected — maps loading, WhatsApp live, booking confirmations accessible — before you reach baggage claim.

    SimClaire covers 150+ destinations worldwide, with plans ranging from single-destination trips to multi-country regional packages. Your QR code arrives by email, installs in minutes on home Wi-Fi, and connects automatically when you land. Your Canadian number stays active for calls and 2FA texts. No queue. No kiosk. No bill shock.

    See why Canadian travelers are switching to SimClaire before their trips

    Check if your phone supports eSIM before you buy

    Building your bridge to the world — before you even pack your bag. 🧡


    Sort your travel tech before your next flight. Browse SimClaire’s eSIM plans at simclaire.com or reach us on WhatsApp at +1 437-605-6560.

    What should I do with my phone before international travel?

    The most important steps are: sort your data connectivity (a travel eSIM from SimClaire before you fly), disable Data Roaming on your home SIM, download offline Google Maps for your destination, update your OS, back up your phone, and save your boarding passes and key documents offline.

    Should I get an eSIM or use roaming before I fly internationally?

    For Canadian travelers, a travel eSIM is almost always the better choice. Rogers, Bell, and Telus charge CA$16–18 per day for international roaming. A SimClaire travel eSIM for the same trip costs a fraction of that, with no automatic daily billing and no home number disruption on dual-SIM devices.

    What offline apps should I download before traveling internationally?

    The essentials: Google Maps (with offline maps downloaded), Google Translate (with offline language packs), XE Currency (with offline rates updated), TripIt (with your itinerary synced), and WhatsApp. Download and configure all of these on home Wi-Fi before you fly.

    How do I keep my two-factor authentication working abroad?

    Use a dual-SIM setup: a SimClaire eSIM for data, and your home Rogers/Bell/Telus SIM active for incoming calls and texts. Your 2FA codes go to your Canadian number, which stays reachable as long as your home SIM is in the phone.

    How do I install a SimClaire eSIM before I fly?

    Visit simclaire.com, choose your destination plan, and your QR code arrives by email. Scan it through Settings → Mobile Data → Add eSIM while on home Wi-Fi. Takes under 5 minutes. The eSIM is installed and waiting — it activates automatically when you land.

    How early should I set up my phone before a trip?

    48 hours before departure is the sweet spot. That gives time for OS updates (which can be slow), carrier unlock requests (which take 24–72 hours), eSIM installation, offline map downloads, and a full phone backup — without the last-minute rush that causes steps to get skipped.
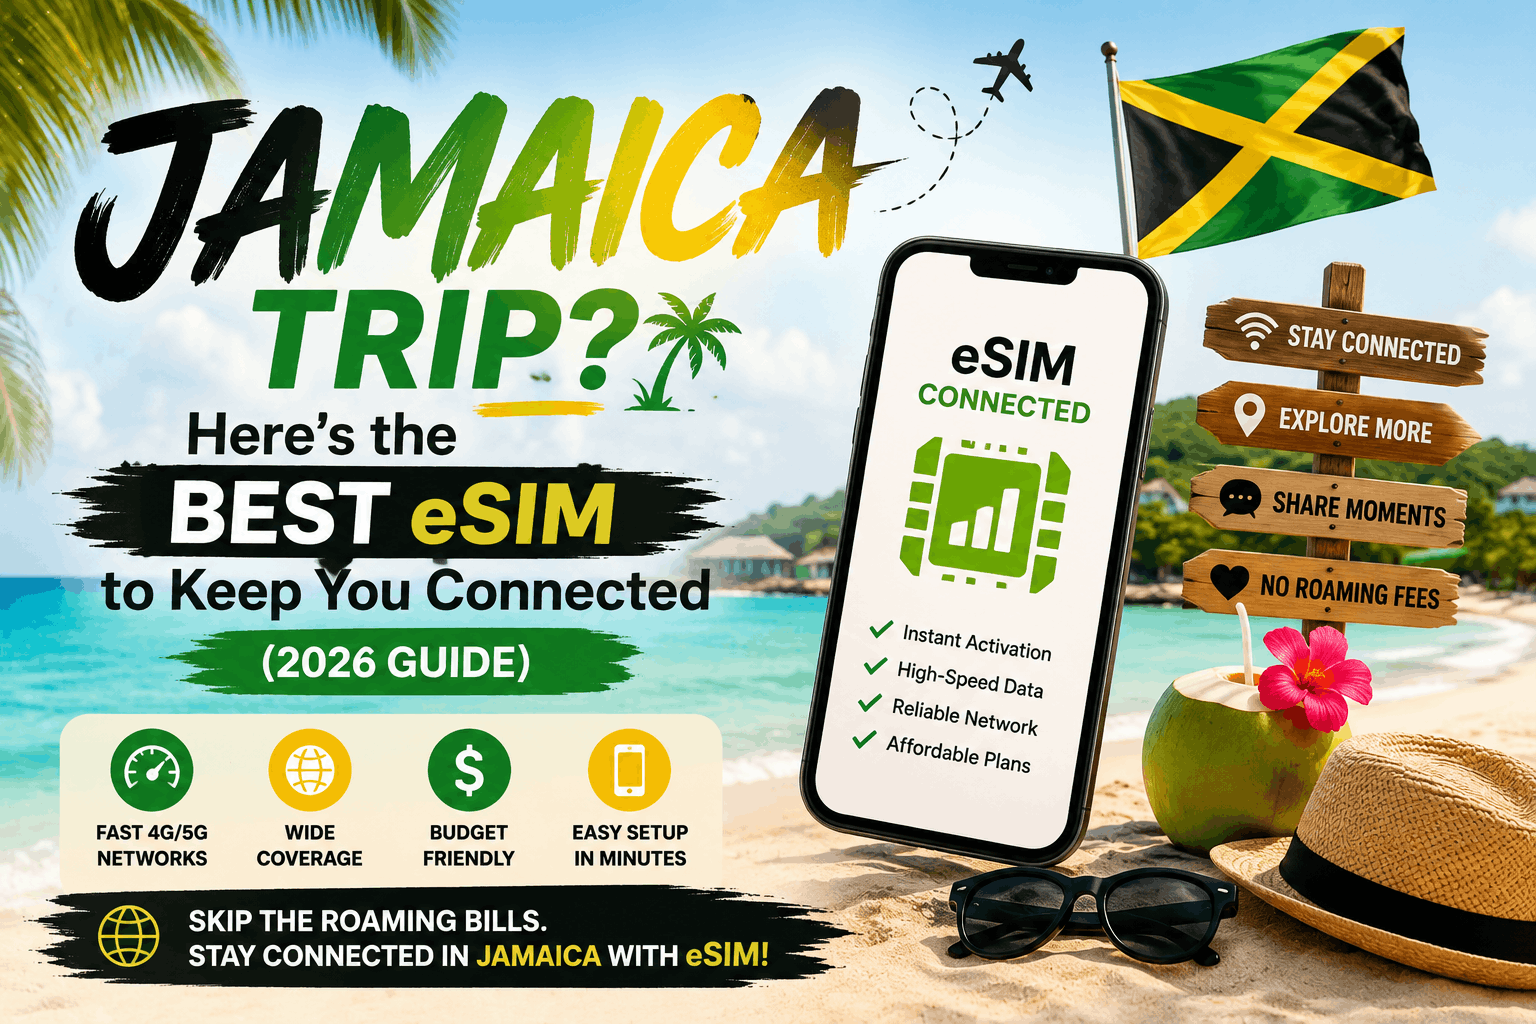
  • Jamaica Trip? Here’s the Best eSIM to Keep You Connected

    Jamaica Trip? Here’s the Best eSIM to Keep You Connected

    Looking for the best eSIM for Jamaica in 2026? Whether you’re headed to an all-inclusive in Montego Bay, road-tripping to Negril, or exploring Kingston — this guide covers Jamaica’s networks, the honest coverage picture, and why a travel eSIM beats roaming on Rogers, Bell, or Telus every time.


    Jamaica is one of the most visited Caribbean destinations for Canadian travelers — and one of the most expensive places to stay connected if you show up without a plan. Rogers, Bell, and Telus all charge CA$16–18 per day for international roaming in Jamaica. A 10-day resort trip on a Canadian carrier plan costs CA$160–180 in phone bills before a single piña colada.

    The best eSIM for Jamaica solves that problem completely. Install a SimClaire Jamaica eSIM before you fly, land at Sangster International or Norman Manley Airport with data already active, and spend the money you saved on something that actually makes your trip better.

    This guide covers everything you need to know: Jamaica’s network landscape, which areas have strong coverage, how much data you actually need, and why a travel eSIM from SimClaire is the smartest connectivity choice for Canadian travelers heading to the island in 2026.


    Jamaica’s Mobile Networks: What You Need to Know Before You Buy

    Before choosing the best eSIM for Jamaica, it’s worth understanding how the island’s mobile networks actually work — because not all eSIMs run on the same network, and in Jamaica, that difference matters.

    The Two Networks: Digicel and Flow

    Jamaica has two main mobile networks: Digicel and Flow. Both carry dependable 4G across Kingston, Montego Bay, Negril, Ocho Rios, and the main resort regions.

    Digicel introduced 4G/LTE services in 2016 and has expanded coverage across the island, including Kingston and Montego Bay. Flow’s LTE network covers 95% of the Jamaican population.

    For most travelers staying on the resort strip or visiting the major tourist towns, either network works reliably. The difference shows up when you venture inland.

    Which Network Is Better for Travelers?

    Digicel is often the safer choice for wider island travel, especially if you will move between Negril, Montego Bay, Ocho Rios, Kingston, Port Antonio, Treasure Beach, and rural day-trip areas.

    Jamaica’s two main networks are Digicel and Flow. Digicel is the island’s largest network, with the broadest coverage and strong 4G across Montego Bay, Negril, Ocho Rios, Port Antonio, and Kingston.

    If you’re staying at an all-inclusive and rarely leaving the resort, both networks work well. If you’re renting a car, doing waterfall tours, or driving between destinations, Digicel’s broader rural coverage makes it the safer pick.

    Is There 5G in Jamaica?

    As of 2026, there is no widely available 5G network in Jamaica. Both Digicel and Flow operate on 4G/LTE networks, which are generally fast enough for navigation, streaming, and social media.

    4G/LTE is plenty for everything a traveler needs — maps, WhatsApp, Instagram, booking confirmations, and video calls back home. Don’t let the lack of 5G put you off; the 4G speeds across Jamaica’s popular tourist areas are solid.

    Where Coverage Gets Weak

    The realistic weak spots in Jamaica are the Blue Mountains, the Cockpit Country interior, and the more remote rural roads, where signal thins between towns.</cite>

    If your itinerary includes hiking the Blue Mountains or exploring the Cockpit Country, download offline Google Maps before you leave your resort. GPS navigation works without data once maps are cached, so you’re not stranded even when signal drops.


    Why Canadian Roaming in Jamaica Is a Bad Deal

    Before getting into Jamaica eSIM plans specifically, let’s put the roaming cost in context — because a lot of Canadian travelers still default to their carrier plan without doing the math.

    What Rogers, Bell, and Telus Charge for Jamaica

    Rogers Roam Like Home charges CA$16/day in 185+ countries. Telus Easy Roam charges CA$18/day everywhere outside the US. Bell Roam Better charges CA$16/day with a 5GB high-speed cap.</cite>

    Jamaica falls under the international rate for all three carriers. For a typical 7-night resort trip:

    CarrierDaily Rate7-Day Total10-Day Total
    Rogers Roam Like HomeCA$16/dayCA$112CA$160
    Telus Easy RoamCA$18/dayCA$126CA$180
    Bell Roam BetterCA$16/dayCA$112CA$160

    That’s CA$112–180 per person, per device, for a week in Jamaica — before you’ve paid for a single excursion, meal, or drink outside the all-inclusive. For a couple traveling together, double those numbers. For a family of four, multiply by four.

    The Roaming Traps That Make It Worse

    Beyond the daily rate, <cite index=”11-1″>carrier international plans activate automatically when you use your device abroad, even briefly. There is no partial-day billing — use your phone for five minutes or five hours, and the cost is identical.</cite>

    Land at Montego Bay at 11:50pm. Check one message. You’ve just paid CA$16–18 for 10 minutes of access. This is the roaming trap that catches travelers who think they’re being careful.

    A SimClaire Jamaica travel eSIM runs on a fixed-data model — you buy the data, you use the data, and there is no per-day billing clock running in the background.


    How Much Data Do You Actually Need in Jamaica?

    One of the most common mistakes travelers make when buying a Jamaica eSIM is over- or under-estimating their data needs. Here’s a realistic breakdown by trip type.

    Resort Stay (7 Days, Mostly On-Property)

    If you’re at an all-inclusive with decent resort Wi-Fi, your mobile data needs are lower than you think. You’ll use data for:

    • Navigation on arrival and departure
    • Maps and Google searches for excursions
    • WhatsApp and messaging
    • Quick social media uploads away from the resort

    Recommended: 1–3GB plan for a 7-day resort stay with light off-property use.

    Active Explorer (7–14 Days, Moving Between Destinations)

    If you’re road-tripping between Montego Bay, Negril, Ocho Rios, and Kingston — renting a car, booking tours independently, navigating without a guide — your data needs are higher.

    • Google Maps running while driving
    • Booking tour operators and restaurants in real time
    • WhatsApp coordination with tour guides and villa hosts
    • Instagram and photos uploading on the go

    Recommended: 3–5GB plan for a 7–14 day itinerary with active off-resort use.

    Extended Stay or Digital Nomad (14+ Days)

    For longer stays where you’re working remotely part of the time or using your phone as a primary internet connection:

    Recommended: Unlimited plan or a high-data fixed plan sized to your actual usage.

    Most travel eSIMs are data-only — and that covers 90% of travelers perfectly. WhatsApp, FaceTime, and Google Voice handle calls and video seamlessly.</cite> You don’t need a local Jamaican number for a typical resort or explorer trip — your Canadian number stays active for calls and texts on your home SIM while the SimClaire eSIM handles data.


    What Makes SimClaire the Best eSIM for Jamaica

    There are several Jamaica eSIM options on the market. Here’s why SimClaire stands out specifically for Canadian travelers.

    Built for How Canadians Travel

    Most eSIM providers are built for a global audience. SimClaire is built specifically for Canadian travelers — which means the pricing is in CAD, the support is in Canadian time zones, and the plans are designed around the destinations Canadians actually visit. Jamaica is one of the most popular Caribbean destinations for Canadians, and SimClaire’s Jamaica eSIM plan is priced to reflect that.

    No Daily Billing Clock

    Unlike Rogers, Bell, and Telus roaming, a SimClaire Jamaica eSIM runs on a flat-rate data model. You buy a data allowance, it’s valid for your trip duration, and there’s no per-day charge that triggers every time you check a message. The cost is fixed before you fly.

    QR Code by Email — Install Before You Land

    Your SimClaire eSIM QR code is delivered by email after purchase. Scan it at home on your Wi-Fi, install it through your phone’s native settings, and your Jamaica eSIM is ready to connect the moment your plane lands at MBJ or KIN. No airport SIM kiosk. No passport registration. No queue.

    This matters more in Jamaica than most destinations because airport SIM card prices at Montego Bay and Kingston are higher compared to official stores in the city — the airport markup applies whether you’re buying from a local carrier or a kiosk reseller.

    Your Canadian Number Stays Active

    On dual-SIM devices, your home SIM (Rogers, Bell, Telus) stays active for incoming calls and texts while the SimClaire Jamaica eSIM handles your data. Your home SIM stays active in the background, so you can still receive SMS messages — useful for two-factor authentication — and incoming calls.

    This is critical for banking apps, travel booking confirmations, and anyone who needs to be reachable on their regular Canadian number while abroad.

    WhatsApp Support — Not Just a Ticket Queue

    When you’re at a resort in Negril with a connectivity question, you need an answer now, not a support ticket that resolves in 48 hours. SimClaire’s WhatsApp support at +1 437-605-6560 puts a real person in reach during Canadian business hours — the same time zone you’re likely operating in from Jamaica.


    How to Set Up Your Jamaica eSIM (Step-by-Step)

    Setting up the best eSIM for Jamaica takes under 10 minutes and should be done before you fly.

    Step 1: Check Your Phone Is eSIM Compatible

    Most phones from 2018 onward support eSIM. This includes iPhone XS and later, Google Pixel 3 and later, and Samsung Galaxy S20 and later. Check SimClaire’s eSIM compatibility guide if you’re unsure about your specific model.

    Step 2: Confirm Your Phone Is Carrier Unlocked

    A locked phone will not accept an eSIM from another provider. If you bought your phone outright or off-contract, it’s likely already unlocked. If you bought it on a Rogers, Bell, or Telus contract, contact your carrier to confirm or request an unlock before your trip.

    Step 3: Purchase Your SimClaire Jamaica eSIM

    Visit simclaire.com and select your Jamaica plan based on trip length and data needs. Your QR code arrives by email within minutes.

    Step 4: Install on Home Wi-Fi Before You Fly

    Scan the QR code through your phone’s Settings → Mobile Data → Add eSIM. The installation takes under 5 minutes and does not activate until you arrive in Jamaica. Do this at home — not at the airport.

    Step 5: Turn Off Data Roaming on Your Home SIM

    Go to Settings → Mobile Data → Mobile Data Options and turn off Data Roaming on your Rogers, Bell, or Telus SIM. This prevents any accidental roaming charges if your home SIM connects to a Jamaican network before the eSIM kicks in.

    Step 6: Land Connected

    Turn off airplane mode when you land. Your SimClaire Jamaica eSIM connects to Digicel’s 4G network automatically. Open Google Maps, send your arrival message on WhatsApp, and head to baggage claim — already connected.


    Jamaica eSIM vs Local SIM Card: Which Is Better?

    This is a fair question, and the honest answer depends on your trip.

    For a one to two week resort trip, a travel eSIM is the easiest choice. For a long stay, a local Digicel SIM is cheaper per gigabyte.

    Here’s the practical breakdown:

    SimClaire Jamaica eSIMLocal SIM Card
    SetupBefore you fly, at homeAt airport or city store
    Passport requiredNoYes
    Queue timeNone20–45 min
    Price vs roaming70–80% less than carrierCheapest per GB
    Home number stays activeYes (dual SIM)No
    Best for7–14 day trips30+ day stays
    SupportWhatsApp, anytimeLocal store hours

    For the vast majority of Canadian travelers — a 7–10 day resort or explorer trip — the SimClaire Jamaica eSIM wins on every practical dimension. The only scenario where a local SIM card genuinely beats it is a month-long stay where maximum data per dollar is the priority.


    Jamaica Travel Tips: Staying Connected Beyond the Resort

    A few practical notes for staying connected across Jamaica’s most popular destinations.

    Montego Bay

    Strong 4G coverage across the hotel strip, Hip Strip, and city centre. Both Digicel and Flow work reliably here. This is where most Canadians land, and connectivity is not a concern.

    Negril

    Good 4G coverage along the beach strip and Seven Mile Beach. Signal can thin slightly in the more remote western tip. A Digicel-based eSIM performs best for the full Negril area.

    Ocho Rios

    Reliable 4G in town and around Dunn’s River Falls. The drive between Ocho Rios and Kingston through the mountains can have patches of weaker signal — download offline maps before heading out.

    Kingston

    Strong 4G coverage across the capital, including New Kingston, Half Way Tree, and the waterfront. If you’re combining a Kingston city visit with north coast resort time, your SimClaire eSIM handles both without switching plans.

    Blue Mountains

    Coverage is excellent along the populated coasts and good on most tour routes. The Blue Mountains and deep interior get patchy on every network — keep offline maps as backup.</cite> Download your Blue Mountains trail maps before leaving your accommodation.


    Frequently Asked Questions

    What is the best eSIM for Jamaica in 2026?

    For Canadian travelers, SimClaire offers the best eSIM for Jamaica — priced in CAD, running on Digicel’s 4G network, installed by QR code before you fly, with WhatsApp support and no daily roaming clock. Browse plans at simclaire.com.

    Does Jamaica have 5G?

    As of 2026, there is no widely available 5G network in Jamaica. Both Digicel and Flow operate on 4G/LTE networks, which are generally fast enough for navigation, streaming, and social media.

    Do I need to show my passport to get a Jamaica eSIM?

    No. A travel eSIM purchased online requires no in-person registration and no passport. Your QR code is delivered by email and installed on your phone at home. This is one of the key advantages of an eSIM over a local physical SIM card in Jamaica, which does require passport registration.

    Can I use WhatsApp in Jamaica with a travel eSIM?

    Yes. WhatsApp works over any data connection — your SimClaire Jamaica eSIM provides the data, and WhatsApp runs normally. This is how most travelers handle calls and messages back home without paying voice roaming rates.

    Will my Canadian number still work if I use a Jamaica eSIM?

    Yes, on dual-SIM devices. Your Rogers, Bell, or Telus SIM stays active for incoming calls and texts. Your SimClaire eSIM handles data. Both run simultaneously on the same phone. Turn off Data Roaming on your home SIM to make sure no roaming charges are triggered on the Canadian line.

    How much data do I need for a week in Jamaica?

    For a 7-day resort stay with light off-property use, 1–3GB is usually sufficient. For an active explorer trip moving between multiple destinations, 3–5GB covers most travelers comfortably. If you’ll be working remotely or using your phone as a primary internet source, an unlimited plan is the safer choice.


    The Bottom Line

    Jamaica is one of the most rewarding Caribbean destinations for Canadian travelers — and one of the most expensive to stay connected in if you rely on Rogers, Bell, or Telus roaming. At CA$16–18 per day per device, a 10-day trip with a family of three can add CA$500+ in phone bills to a vacation budget that’s already stretched.

    The best eSIM for Jamaica cuts that cost dramatically. SimClaire’s Jamaica eSIM plan runs on Digicel’s 4G network, installs before you fly, and costs a fraction of what Canadian carrier roaming charges would run for the same trip. Your Canadian number stays active. There’s no airport queue. No passport required. No daily billing surprises waiting when you land back at Pearson.

    Building your bridge to the world — one island at a time. 🧡


    Ready to land in Jamaica already connected? Browse SimClaire’s Jamaica and Caribbean eSIM plans at simclaire.com or reach us on WhatsApp at +1 437-605-6560.

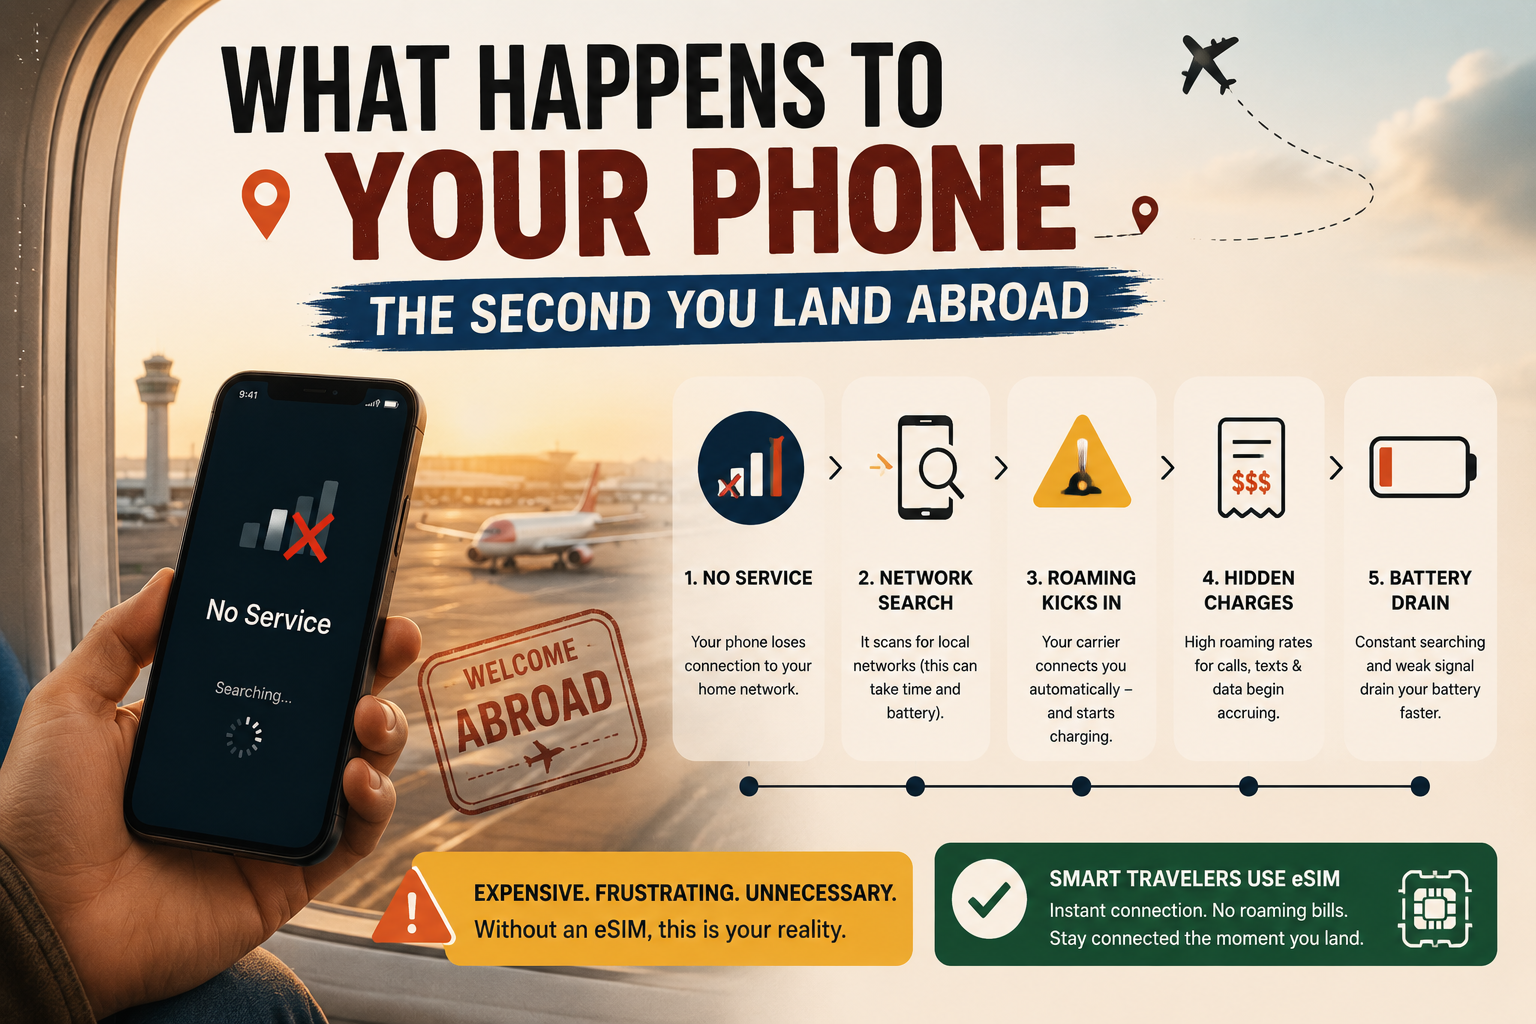
  • What Happens to Your Phone the Second You Land Abroad

    What Happens to Your Phone the Second You Land Abroad

    What happens to your phone when you land abroad is more dramatic than most travelers expect — and more expensive. Before you flip off airplane mode at baggage claim, read this.


    You land. The seatbelt sign goes off. Forty people around you instantly reach for their phones. You do the same. Airplane mode goes off. And in that exact moment — before you’ve collected your bag, before you’ve cleared customs, before you’ve even found the exit — your phone has already started making decisions that could cost you hundreds of dollars.

    What happens to your phone when you land abroad isn’t complicated, but it is fast, automatic, and almost completely invisible. Your phone connects to a foreign network within seconds of getting a signal. If your carrier’s international roaming is active, the billing clock starts immediately. If you don’t have a travel eSIM already set up, that moment is already costing you.

    This guide explains exactly what your phone does the second you land abroad, why roaming charges catch so many Canadian travelers off guard, and what you can do before your next flight to make sure it never happens to you.


    The First 60 Seconds: What Your Phone Does Before You Even Move

    Most travelers think of roaming as something that happens when they actively use their phone — open an app, make a call, load a map. The reality is different and more expensive.

    The moment you disable airplane mode, your phone performs a digital handshake with a foreign tower. This process, known as international roaming, allows you to maintain a connection even when you are outside your home provider’s coverage area.</cite>

    That handshake happens in seconds. And it doesn’t wait for you to open an app.

    The silent data triggers you never see

    Several hidden triggers can activate roaming charges without you ever opening an app. Background App Refresh causes apps like Maps, Mail, and Social Media to constantly sync data to provide real-time updates. Wi-Fi Assist automatically switches you to roaming data if the local Wi-Fi signal is weak. Visual Voicemail downloads audio files for voicemails in the background, consuming data instantly. Automatic Updates can trigger gigabytes of data usage while you sleep.</cite>

    None of these require you to touch your phone. All of them generate data usage — and if international roaming is active on your home SIM, all of them generate roaming charges.

    The overnight data problem

    A single night with data roaming enabled can trigger 50–200MB of background usage. Depending on your carrier, that translates to CA$50–200 in charges while you’re unconscious.</cite>

    This is one of the most common sources of roaming bill shock for Canadian travelers. The phone sits on the nightstand. Nobody touches it. The bill arrives three weeks later.


    Why Roaming Charges Start Before You Even Reach Baggage Claim

    Understanding how roaming works is the first step to not being surprised by it.

    International roaming works through agreements between your home network and foreign networks. When you arrive abroad and turn off airplane mode, your phone sends a signal that is picked up by a local cell tower. The foreign network checks with your home carrier to see if your account allows international access. If approved, you are granted access. Your home carrier will then track your usage on this foreign network and bill you according to your contract rates.</cite>

    For Canadian travelers on Rogers, Bell, or Telus, those contract rates mean a daily roaming charge of CA$16–18 per day — activated automatically, billed even for minimal use, and applied from the moment your phone first connects to a foreign tower.

    The automatic activation trap

    Most carrier international plans activate automatically when you use your device abroad, even briefly. Check one email or receive a text message, and you’re charged for the entire day. There is no partial-day billing — use your phone for five minutes or five hours, and the cost is identical.</cite>

    Land at 11:45pm local time. Receive one welcome text from the foreign carrier. You’ve just paid CA$16–18 for 15 minutes of access.

    What happens if you have no roaming plan at all

    In 2024, travelers worldwide racked up over $60 billion in unexpected roaming charges. Most people who got hit with these bills didn’t even know data roaming was on — no warning message, no spending alert, just an email from their carrier weeks later with a four-figure charge.</cite>

    If you don’t have a daily pass activated, <cite index=”12-1″>international roaming without a plan can cost over CA$20 per megabyte on pay-per-use rates — meaning a single video call could run hundreds of dollars.</cite>


    The 5 Things Your Phone Does Automatically When You Land Abroad

    Here is the exact sequence of what happens to your phone when you land abroad — most of it invisible, all of it billable if your home SIM’s roaming is active.

    1. It connects to the strongest local tower

    Within seconds of airplane mode going off, your phone scans for available networks and connects to the strongest signal. It doesn’t ask permission. It doesn’t warn you. It connects — and if that network is a roaming partner of your Canadian carrier, billing begins.

    2. Your carrier sends you a “welcome” text

    You’ll almost certainly receive a text from your home carrier within minutes of landing: “Welcome to [country]. Roaming rates apply.” This text itself is not a charge. But the data connection that received it is now active and billable.

    3. Background apps begin syncing

    Email refreshes. iCloud or Google Photos begins uploading your last camera roll. WhatsApp downloads messages and media. Weather updates. Maps refreshes your location. <cite index=”27-1″>Even receiving a welcome SMS from a local provider can occasionally trigger a daily fee if your phone responds with a delivery receipt.</cite> All of this happens before you’ve picked up your bag.

    4. Your apps request location access

    Navigation apps, ride-hailing apps, hotel apps — all of them ping your location when they detect you’ve moved. That location ping requires a data connection. On a home SIM with roaming active, it costs money. On a SimClaire travel eSIM, it’s included in your plan.

    5. Automatic updates queue up

    Your phone detects it’s been in airplane mode for hours and queues every pending app and system update for immediate download. On home Wi-Fi, those updates are free. On a roaming connection, <cite index=”30-1″>a single night of background data can trigger 50–200MB of usage</cite> — and your carrier bills per megabyte or per day, not per choice.


    iPhone vs Android: Does It Matter What Phone You Have?

    The short answer is no — both platforms have roaming on by default, and both will connect to foreign networks automatically. But the settings to manage it differ.

    On iPhone

    Go to Settings → Mobile Data → Mobile Data Options → Data Roaming. Toggle it off to prevent your home SIM from roaming. You can also go to Settings → General → Background App Refresh and disable it entirely while traveling.

    For eSIM-compatible iPhones (iPhone XS and later), you can install your SimClaire eSIM as a separate line and set it as your default data line — leaving your Rogers, Bell, or Telus SIM active for calls and texts but preventing it from roaming.

    On Android

    Go to Settings → Connections → Mobile Networks → Data Roaming and toggle it off. On Samsung devices specifically: Settings → Connections → Data Usage → Data Saver adds an additional layer of background data control.

    Android’s dual-SIM management also makes eSIM setup straightforward — you can assign data to your SimClaire eSIM and calls/texts to your home SIM simultaneously.


    How a Travel eSIM Changes What Happens When You Land

    This is where the experience of landing abroad changes completely.

    If you’ve set up a SimClaire travel eSIM before your flight, what happens to your phone when you land abroad looks entirely different. Instead of your home SIM scrambling to connect to a foreign roaming partner at CA$16–18/day, your eSIM connects directly to a local network as a local subscriber.

    Your home SIM stays active in the background, so you can still receive SMS messages — useful for two-factor authentication — and incoming calls, though answering those calls may incur roaming charges.</cite>

    What this means in practice:

    • Your eSIM data line connects to the local 4G or 5G network automatically
    • Background apps sync over the eSIM, not your home SIM
    • Your Canadian number stays reachable for calls and texts
    • No roaming clock is running on your home carrier account
    • No surprise daily charge for the 15 minutes between landing and reaching your hotel

    The cost difference between roaming and a travel eSIM is significant. A 10-day Europe trip on Rogers Roam Like Home costs CA$160. A 10-day SimClaire Europe eSIM plan costs a fraction of that — with no automatic activation trap and no per-day billing.


    The Pre-Landing Checklist: What to Do Before You Fly

    The best time to sort your phone connectivity is before you board, not after you land. Here is exactly what to do.

    48 hours before your flight:

    • Check if your phone is eSIM compatible
    • Purchase your SimClaire eSIM plan for your destination
    • Install the eSIM via QR code on home Wi-Fi

    The night before:

    • Turn off Data Roaming on your home SIM (Settings → Mobile Data)
    • Turn off Background App Refresh
    • Download offline Google Maps for your destination
    • Save hotel address, booking confirmations, and transit info offline

    At the gate:

    • Switch to airplane mode for the flight
    • Double-check your eSIM is installed and showing in your SIM settings

    The moment you land:

    • Turn off airplane mode
    • Your SimClaire eSIM connects automatically — no setup required at the airport
    • Your home SIM stays active for calls and texts, roaming data is off
    • You walk through arrivals connected, with no roaming clock running

    What Happens to Your Phone in Specific Countries

    The roaming experience isn’t identical in every destination. Some countries have additional rules that affect what your phone does when you land.

    Indonesia and Kenya require IMEI registration at the airport to avoid permanent signal loss. Russia enforces a mandatory 24-hour blackout on data and SMS for all foreign SIMs. Turkey blocks foreign devices after 120 days unless a registration fee of approximately $1,260 is paid.</cite>

    For most popular Canadian travel destinations — Europe, the USA, Southeast Asia, the Caribbean — none of these extreme rules apply. But it’s worth checking your specific destination’s mobile rules before you fly, particularly for less-common routes.

    For Europe, SimClaire’s best eSIM for Europe covers 34 countries under one plan — including Switzerland and the UK, which many competitors quietly exclude.

    For the USA, a SimClaire US eSIM connects to local networks directly, bypassing Canadian carrier roaming rates entirely. Particularly relevant for snowbirds and extended-stay travelers where monthly roaming costs would otherwise compound dramatically.


    Frequently Asked Questions

    Does my phone automatically roam when I land abroad?

    Yes. The moment you turn off airplane mode, your phone connects to the strongest available network. If your home carrier has a roaming agreement with a local network in that country, roaming begins automatically — even before you open any app.

    How do I stop my phone from roaming when I land abroad?

    Go to Settings → Mobile Data → Mobile Data Options and turn off Data Roaming before your flight. This prevents your home SIM from connecting to foreign networks. You can then use a travel eSIM for data without triggering home carrier charges.

    What is the cheapest way to use my phone abroad?

    A travel eSIM purchased before you fly is consistently the cheapest option for Canadian travelers. SimClaire’s plans cover 150+ destinations and cost significantly less than Rogers, Bell, or Telus daily roaming rates — with no automatic activation trap and no bill shock on return.

    Can I keep my Canadian number while using a travel eSIM?

    Yes. On dual-SIM devices, your home SIM stays active for calls and texts while the eSIM handles data. You receive calls and texts on your regular Canadian number, and your data runs through the local eSIM network at local rates.

    Do I need internet to install a travel eSIM?

    You need a Wi-Fi connection to scan the QR code and install the eSIM. This is why SimClaire recommends installing your eSIM before you leave home — not at the airport, and certainly not after you’ve already landed abroad.


    The Bottom Line

    What happens to your phone when you land abroad is automatic, fast, and expensive if you’re not prepared. Your phone connects to a foreign tower within seconds. Background apps start syncing within minutes. If your home SIM’s roaming is active, the billing clock started before you reached baggage claim.

    The fix is straightforward: set up a SimClaire travel eSIM before you fly, turn off data roaming on your home SIM, and land knowing exactly what your connectivity will cost — because it’s already paid for.

    Building your bridge to the world — before you even land. 🧡


    Ready to land connected without the roaming bill? Browse SimClaire’s eSIM plans at simclaire.com or reach us on WhatsApp at +1 437-605-6560.

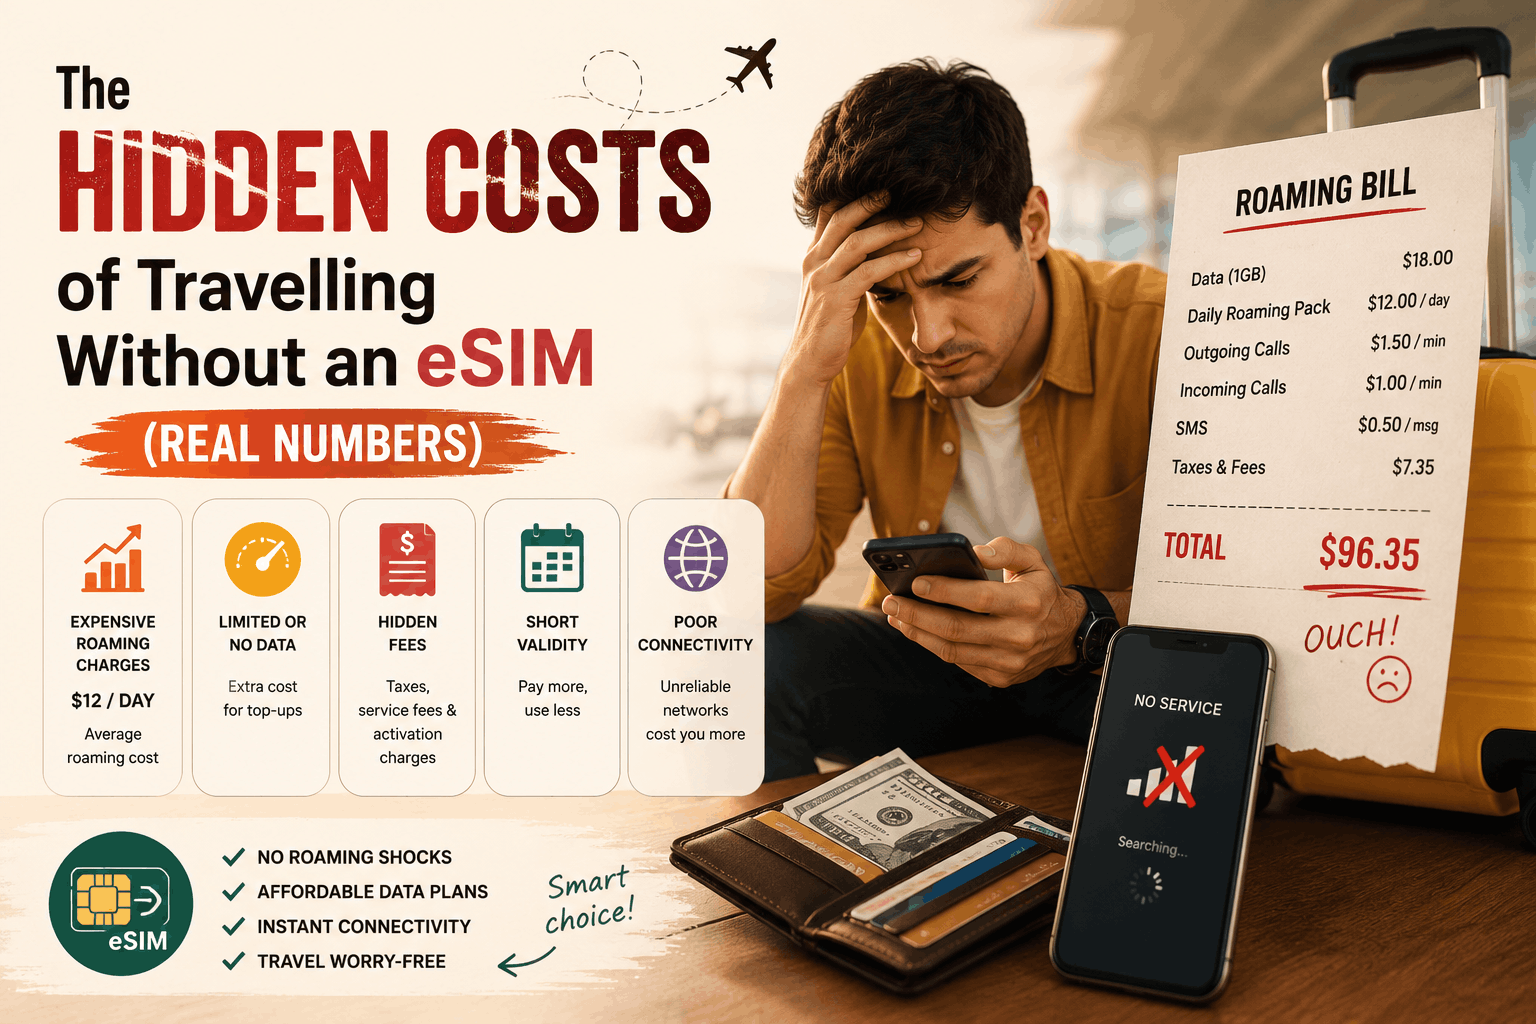
  • The Hidden Costs of Travelling Without an eSIM (Real Numbers)

    The Hidden Costs of Travelling Without an eSIM (Real Numbers)

    Think roaming charges are just a small inconvenience? The hidden costs of travelling without an eSIM are bigger than most Canadian travelers realize — and the numbers prove it. Here’s exactly what you’re paying, broken down by trip type, traveler type, and carrier.


    Most travel budgets account for flights, hotels, food, and activities. Almost nobody budgets for the phone bill — because it doesn’t feel like a choice. You land, you flip off airplane mode, and whatever your carrier charges, you pay.

    That assumption is costing Canadian travelers hundreds of dollars per trip.

    The hidden costs of travelling without an eSIM don’t show up until you’re already home. By then, the damage is done: a roaming bill that quietly doubled your daily spend, a family vacation that cost CA$800 more than it needed to, a two-week euro trip that came with a CA$252-per-person connectivity surcharge nobody mentioned at booking. These aren’t edge cases. They’re what happens when you travel with your Canadian carrier plan and don’t read the fine print before you fly.

    This post puts real numbers to what travelling without an eSIM actually costs — by carrier, by destination, by trip length, and by household size — so you can make an informed decision before your next departure.


    What Canadian Carriers Actually Charge for International Roaming in 2026

    Let’s start with the published rates, because most travelers have a vague sense that roaming is “expensive” without knowing the specific numbers.

    As of mid-2026, Canada’s Big Three carriers charge the following for international roaming:

    • Rogers Roam Like Home: CA$16/day in 185+ countries
    • Telus Easy Roam: CA$16/day in the US, CA$18/day everywhere else
    • Bell Roam Better: CA$16/day, with a 5GB high-speed cap on Ultimate plans (after which speeds drop to 512Kbps for the rest of the day)

    These are daily pass rates, and they activate automatically the moment you use your phone abroad — even if it’s just to check one email or receive a text. There’s no partial-day billing. Use your phone for five minutes or five hours on the same day: same charge.

    That daily rate model sounds manageable until you do the math across a full trip.


    The Real Numbers: What Roaming Actually Costs Per Trip

    Solo traveler, 10-day US trip

    Roaming on Rogers, Bell, or Telus: CA$130–160

    A SimClaire US eSIM plan for the same trip: significantly less — and no surprise bill when you land at Pearson.

    Solo traveler, 14-day Europe trip

    A 14-day European trip on Telus Easy Roam, Rogers Roam Like Home, or Bell Roam Better runs roughly CA$224–252 per person. That’s before tax, before any overage charges, and before the daily cap kicks in and throttles your speed.

    Family of four, 14-day Europe trip

    For a family of four on a two-week trip in Europe at CA$16–18/day per device, the roaming total reaches nearly CA$900 in connectivity charges alone — on top of flights, hotels, and everything else.

    CA$900 is two return flights between Toronto and London at off-peak prices. It’s four nights of mid-range accommodation in Rome. It’s a significant portion of the travel budget, quietly consumed by a phone bill.

    Solo traveler, 21-day trip

    A 21-day trip runs CA$336–378 in carrier roaming costs. A regional travel eSIM for the same duration and coverage costs a fraction of that.

    What happens if you don’t have a roaming plan at all

    International roaming without a plan can cost over CA$20 per megabyte on pay-per-use rates — meaning a single video call could run hundreds of dollars.Most carriers have moved away from pure pay-per-use billing, but the risk still exists for travelers who don’t activate a daily pass before their phone connects abroad.


    The Costs Nobody Talks About

    The daily rate is the obvious number. But the hidden costs of travelling without an eSIM go beyond the per-day charge. Here’s what else quietly adds up.

    1. The automatic activation trap

    Most carrier international plans activate automatically when you use your device abroad, even briefly. Check one email or receive a text message, and you’re charged for the entire day. There’s no partial-day billing — use your phone for five minutes or five hours, and the cost is identical.

    For layovers, short border crossings, or an early morning arrival where you’re charged a full day rate for two hours of use before midnight — this trap catches thousands of Canadian travelers every year.

    2. Throttling after daily caps

    Bell’s 2026 restructured plans cap high-speed data at 5GB per day when roaming. After that, speeds drop to 512Kbps for the rest of the day. That’s roughly slow 3G — workable for a WhatsApp message, unworkable for Google Maps with live traffic, Spotify, or a video call.

    You’re paying CA$16/day for a plan that stops performing like what you paid for the moment you hit 5GB. Telus and Rogers apply similar soft caps on roaming data even within their Easy Roam and Roam Like Home plans.

    3. The CRTC complaint spike — because travelers are getting burned

    The 2026 roaming landscape saw a 61% spike in customer complaints to the CCTS (Commissioner for Complaints for Telecommunications Services). That’s not a statistic about confused customers — it’s a signal that the gap between what carriers market and what travelers experience is widening.

    The CRTC has now introduced a CA$50 usage alert mandate, designed to warn travelers before they cross thresholds. It’s a useful protection — but it doesn’t change the underlying rates, and the structural reality of three carriers controlling roughly 90% of the market, with daily roaming fees in the CA$16–18 range, is unlikely to change because of a regulatory tweak.

    4. The productivity cost of throttled Wi-Fi hunting

    This one never shows up on a bill, but it’s real. Travelers without reliable mobile data spend a disproportionate amount of trip time hunting for free Wi-Fi — in coffee shops, hotel lobbies, airport terminals — rather than navigating, booking, or just being present on the trip they paid for.

    The hidden cost of travelling without an eSIM isn’t just financial. It’s the taxi you couldn’t book because Maps wasn’t loading. It’s the reservation you couldn’t confirm because the restaurant’s website timed out. It’s the 20 minutes of your Rome afternoon spent arguing with a café’s Wi-Fi password.


    The eSIM Alternative: What the Same Connectivity Actually Costs

    The same data on a travel eSIM for a 10-day US trip runs about CA$35 per person — compared to CA$130–160 on a carrier roaming plan.

    Travel eSIM plans save Canadian travelers up to 84% compared to their carrier’s roaming rates.

    For most travelers from Canada, a travel eSIM will cost 60–90% less than a carrier day pass for the same trip.

    The math across different trip scenarios looks like this:

    TripCarrier Roaming (est.)Travel eSIM (est.)Estimated Saving
    Solo, 10 days USACA$130–160CA$25–40CA$100–130
    Solo, 14 days EuropeCA$224–252CA$30–55CA$180–210
    Family of 4, 14 days EuropeCA$896–1,008CA$120–220CA$700–800
    Solo, 21 days multi-countryCA$336–378CA$45–75CA$280–310

    These aren’t marketing estimates. They’re based on published Big Three rates versus real regional eSIM plan pricing — the kind of comparison you can verify before you book.


    “But My Plan Includes International Roaming” — Does It Really?

    This is the most common objection — and the most important one to unpack.

    Many Canadian phone plans include some form of international data, often described as “unlimited” or “included roaming.” What that typically means in practice is one of three things:

    Option A: A fixed number of roaming days are included (e.g., 10 days/year), after which standard daily rates apply.

    Option B: “Unlimited” roaming data that throttles to 128Kbps or 256Kbps after a soft cap — speeds too slow for most modern travel use cases.

    Option C: Roaming that’s included in premium plan tiers at CA$90–120/month, which only makes financial sense if you travel internationally more than once per billing cycle.

    In none of these cases is the actual connectivity equivalent to what a local data line delivers. A travel eSIM connects directly to a local 4G or 5G network in your destination country. Carrier roaming adds extra routing between you and the local tower, which can slow your speeds — meaning even when you’re paying CA$16/day, you’re often not getting the same performance as a local subscriber on the same network.


    Who Gets Hit Hardest by Roaming Costs

    The hidden costs of travelling without an eSIM don’t affect every traveler equally. Some groups consistently end up paying the most.

    Families traveling together bear the steepest cost simply because the daily charge multiplies by device. A family of four on Rogers Roam Like Home in Europe for 14 days is looking at close to CA$900 in connectivity before a single tourist attraction is visited.

    Long-stay travelers — snowbirds, digital nomads, study-abroad students — face the scenario where a monthly eSIM plan at a flat rate is dramatically cheaper than 30 individual roaming days at CA$16 each (CA$480/month on Telus Easy Roam).

    Frequent international travelers who haven’t reassessed their connectivity setup in the last two years are almost certainly overpaying. The eSIM math wins by 80–95% for leisure travelers, families splitting connectivity costs, and anyone going for more than a few days.

    First-time international travelers are most vulnerable to the automatic activation trap — landing, turning off airplane mode out of habit, and racking up a full day’s roaming charge before they’ve even reached baggage claim.


    What SimClaire Does Differently

    SimClaire’s eSIM plans are built around the way Canadians actually travel — not around the daily rate model that makes roaming expensive.

    Instead of paying CA$16 per day regardless of how much or how little you use your phone, you choose a fixed-data or unlimited plan sized to your actual trip. A 10-day Europe trip with moderate data use costs a fraction of what Rogers, Telus, or Bell charge for the same ten days. A 30-day multi-country trip costs the kind of flat rate that makes monthly budgeting straightforward.

    The specifics:

    • 150+ destinations covered — including the countries Canadian carriers quietly exclude from their standard roaming tiers
    • QR code delivered by email — install before you fly, activate the moment you land
    • Dual-SIM compatible — your Canadian number stays active for calls and texts while the SimClaire eSIM handles data
    • No automatic activation traps — your eSIM data is yours to use on your schedule, not triggered by a background email sync at 3am
    • WhatsApp support — real help when you need it, not a ticket queue that resolves after you’ve already landed home

    The hidden costs of travelling without an eSIM are real, they’re significant, and they compound with every trip and every device on your plan. The fix is a five-minute setup before you fly.

    Building your bridge to the world — without the roaming bill. 🧡


    See what you’d actually pay for your next trip. Browse SimClaire’s eSIM plans at simclaire.com or reach us on WhatsApp at +1 437-605-6560.


    Quick Reference: Canadian Carrier Roaming Rates 2026

    CarrierUSA Daily RateInternational Daily Rate
    Rogers Roam Like HomeCA$16/dayCA$16/day (185+ countries)
    Telus Easy RoamCA$16/dayCA$18/day
    Bell Roam BetterCA$16/dayCA$16/day (5GB cap, then throttled)

    Rates verified as of mid-2026. Always confirm current rates directly with your carrier before traveling.

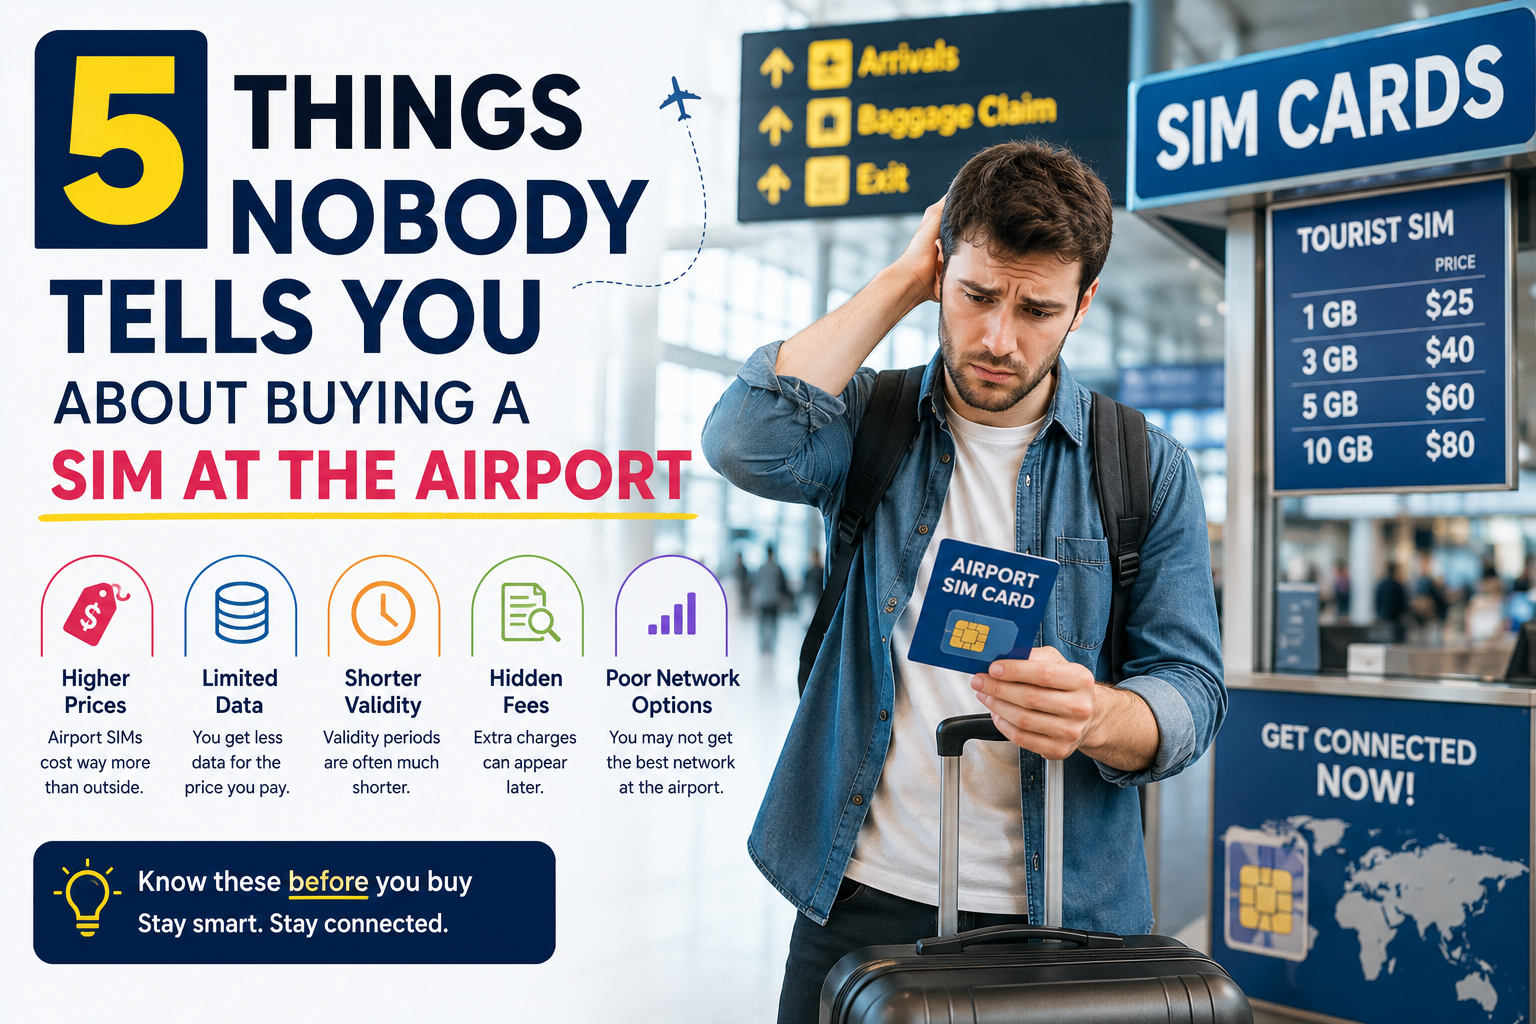
  • 5 Things Nobody Tells You About Buying a SIM at the Airport

    5 Things Nobody Tells You About Buying a SIM at the Airport

    You just landed after a long flight. Your phone is on airplane mode, you need directions, and there’s a shiny kiosk in the arrivals hall selling SIM cards. Seems like the obvious move. Here’s what 5 things nobody is telling you.


    There’s a reason airport SIM kiosks exist — and it has nothing to do with looking out for you. They exist because tired, disoriented travelers make easy customers. You’ve just landed in an unfamiliar country, you need data immediately, and there’s a convenient counter right there between baggage claim and the exit. Captive audience. Premium prices.

    Most travel guides will tell you to “just grab a SIM at the airport.” Almost none of them explain what that actually costs you — in money, time, and frustration. Here are five things you’ll find out only after you’ve already paid.


    Thing #1: You’re Paying 30–100% More Than the Exact Same Plan Costs Anywhere Else

    This is the one that stings the most. Airport SIM kiosks operate in some of the highest-rent retail space in any country. Terminal real estate costs more than a downtown storefront — and that cost is passed directly to you through inflated prices on every plan they sell.

    The markup is well-documented across destinations. In the USA, a plan that costs $40 at the airport kiosk is often available for $25 at any Walmart, Target, or carrier store in the city. In Turkey, the same Turkcell 20GB tourist SIM sold for ~$30 USD at a city store runs $50–70 USD at Istanbul Airport. In Japan, Thailand, the UK — the pattern repeats everywhere. Airport kiosk pricing is a convenience tax, and the fee is steep.

    What makes this worse is that staff at many airport kiosks earn commission on upsells. The plan being recommended to you isn’t necessarily the best fit for your trip length. It’s often the highest-margin option that still sounds reasonable to an exhausted traveler who just wants to get moving.

    The fix: Know before you go. Compare plans online before your flight, not at the kiosk counter while the queue builds behind you.


    Thing #2: Some Countries Require Your Passport — And That Adds 20–45 Minutes to the Process

    This one catches first-time international travelers completely off guard. In several countries, buying a local SIM as a tourist isn’t just a cash transaction — it’s a registration process that involves showing your passport, having your details entered into a carrier database, and sometimes even biometric verification.

    Saudi Arabia requires fingerprint and passport registration for all mobile subscriptions. India requires passport registration for tourist SIMs. Several Southeast Asian countries have similar rules. Even in countries with lighter requirements, the paperwork still has to happen at the counter, with staff manually entering your details — which explains why the “quick SIM stop” at the airport so reliably turns into a 30–45 minute queue.

    Arrive on a busy international flight, join the arrivals hall queue, and you might spend the first hour of your trip in line at a kiosk before you’ve even sent your “landed safely” message home.

    The fix: An eSIM purchased online requires zero in-person registration. Your QR code arrives by email, installs on your phone in minutes, and is ready to connect the moment you land — no counter, no queue, no passport required.


    Thing #3: That Plan Might Not Actually Work on Your Locked Phone

    Here’s the scenario nobody warns you about: you pay for the SIM, you pop it in, you restart your phone — and nothing happens. No signal. No data. Just a confused phone and a receipt you can’t do much with.

    Physical SIM cards only work if your device is carrier-unlocked. Many phones purchased on contract — especially in Canada, the US, and the UK — are locked to the home carrier until that lock is removed. The airport kiosk staff may or may not check this before selling you a SIM. Some will. Many won’t.

    The process to unlock your phone typically involves contacting your home carrier, waiting for confirmation, and sometimes a fee — none of which you can easily do while standing in arrivals with a useless SIM and a dead data connection.

    The fix: Check whether your phone is unlocked before you travel. The easiest way: try a different carrier’s SIM and see if it works. If you’re not sure, an eSIM from a compatible provider can sidestep the issue entirely on most modern eSIM-capable devices.


    Thing #4: It’s Usually a Single-Country Plan — Which Means You’ll Need Another One at the Next Border

    Most airport SIM cards are designed to keep you connected in that country. They’re sold by local carriers or local resellers, and the plan you bought in Paris is not the plan that will serve you in Amsterdam three days later.

    For a traveler on a single-destination trip, this is fine. But for anyone doing a euro trip, a multi-stop Asia itinerary, or any journey that crosses borders in under two weeks, the airport SIM math becomes painful quickly. One SIM per country means one new queue, one new registration process, one new plan to configure, and one more physical SIM card to manage (and lose) at every stop.

    The deeper issue is that even if you buy a SIM labeled “Europe” at an airport kiosk, the coverage details matter enormously. Some multi-country plans quietly exclude Switzerland, the UK, or the Balkans. Some throttle to unusable speeds the moment you cross into a country that isn’t the primary network. The kiosk staff aren’t always positioned to walk you through the fine print.

    The fix: A regional eSIM plan covers multiple countries under a single install. One QR code, one plan, automatic network switching as you cross borders. No new kiosk at every airport.


    Thing #5: You Lose Your Home Number the Moment You Insert It

    This one matters more than most people realize until it bites them mid-trip.

    When you physically replace your SIM with a local airport SIM, your home phone number goes offline. Not paused — offline. Anyone who tries to call or text your regular number while that SIM is swapped out simply can’t reach you. Your bank’s two-factor authentication text? Goes to a number that isn’t active. A WhatsApp call from family back home? Same problem. Any app that uses SMS verification — banking, travel bookings, ride-hailing — suddenly becomes a friction point every time it asks you to confirm via your “regular” number.

    This catches travelers completely off guard, especially during longer trips where staying reachable on your primary number actually matters. The workaround — forwarding calls, notifying everyone of a new temporary number, keeping your home SIM somewhere safe — creates exactly the kind of logistical headache that travel is supposed to avoid.

    The fix: An eSIM runs alongside your existing SIM on dual-SIM devices. Your home number stays active for calls and texts. Your eSIM handles data. Both work at the same time, on the same phone, with no swapping required.


    The Bottom Line

    Airport SIM kiosks are designed for travelers who didn’t plan ahead — and they’re priced accordingly. The markup is real, the queue is real, the registration friction is real, and the single-country limitation is very real if your itinerary crosses more than one border.

    The better move is a travel eSIM purchased before you fly. Not because it’s the newest technology, but because it removes every one of the five friction points above: no markup, no queue, no lock issues, no border swap, no losing your home number.

    SimClaire’s eSIM plans cover 150+ destinations worldwide, with Europe plans stretching across 34 countries — including Switzerland and the UK, which plenty of competitors quietly leave off the list. Your QR code arrives by email, installs on home Wi-Fi in minutes, and connects automatically when you land. No kiosk. No queue. No receipt you can’t use.

    Building your bridge to the world — before you even get to the airport. 🧡


    Skip the kiosk line on your next trip. Browse SimClaire’s plans at simclaire.com or reach us on WhatsApp at +1 437-605-6560.


    Quick Reference: Airport SIM vs. SimClaire eSIM

    Airport SIMSimClaire eSIM
    Price vs. market30–100% markupTransparent online pricing
    Setup time20–45 min queue5 min, before you fly
    Passport registrationOften requiredNot required
    Works on locked phonesSometimes notCheck eSIM compatibility
    Multi-country coverageUsually single-country34 countries (Europe)
    Keeps home number activeNoYes (dual SIM)
    SupportKiosk hours onlyWhatsApp, anytime
    Why are SIM cards more expensive at the airport?

    Airport SIM kiosks operate in high-rent terminal space and serve a captive audience of tired travelers. That means markups of 30–100% over the same plan sold online or in a city store. Staff also earn commission on upsells, so you are often pushed toward a larger plan than you actually need.

    Do I need my passport to buy a SIM card at the airport?

    In many countries, yes. Saudi Arabia, India, and several Southeast Asian destinations require passport registration and sometimes biometric verification before activating a tourist SIM. This adds 20–45 minutes to your arrival. A travel eSIM purchased online before you fly requires no in-person registration.

    Will an airport SIM card work on my locked phone?

    “Not always. Physical SIM cards only work on carrier-unlocked phones. If your device was purchased on a contract in Canada, the US, or the UK, it may still be locked to your home carrier. Always confirm your phone is unlocked before traveling, or use a compatible travel eSIM instead.

    Can an airport SIM card work across multiple countries?

    Most airport SIM cards are single-country plans sold by local carriers. If your trip crosses more than one border, you will need a new SIM at each stop. A regional travel eSIM covers multiple countries under one plan and switches networks automatically as you cross borders.

    Will I lose my home phone number if I use an airport SIM?

    Yes. Inserting a local SIM physically replaces your home SIM, taking your regular number offline. Calls, texts, and SMS two-factor authentication sent to your home number will not reach you. A travel eSIM runs alongside your existing SIM on dual-SIM devices, keeping your home number active while the eSIM handles data.

    What is the best alternative to buying a SIM card at the airport?

    A travel eSIM purchased online before you fly. You compare plans from home, pay transparent pricing with no markup, install via QR code on home Wi-Fi, and connect the moment you land — no queue, no passport, no lost home number. SimClaire offers eSIM plans covering 150+ destinations including 34 European countries.

    A step-by-step guide to setting up a travel eSIM before you fly so you land connected, skip the airport kiosk queue, and avoid hidden markups.

    1. Check your phone is eSIM compatible

      Go to Settings on your phone and look for a Mobile Data or SIM option. Most iPhones from XS onward, Google Pixel 3+, and Samsung Galaxy S20+ support eSIM. If unsure, search your phone model plus ‘eSIM compatible’ to confirm.

    2. Confirm your phone is carrier unlocked

      A locked phone will not accept an eSIM from another carrier. Contact your home carrier or check Settings > General > About (on iPhone) to see if an eSIM unlock option appears. Most phones purchased outright or off contract are already unlocked.

    3. Choose your eSIM plan before you fly

      “Visit simclaire.com and select your destination. Compare fixed-data and unlimited plan options based on your trip length. For multi-country trips, choose a regional plan that covers all your destinations under one purchase.

    4. Install your eSIM on home Wi-Fi

      After purchase, your QR code arrives by email within minutes. Scan it through your phone’s Settings > Mobile Data > Add eSIM while connected to home Wi-Fi. The eSIM installs in under 5 minutes and will not activate until you land.

    5. Set your eSIM as the active data line at your destination

      Once you land, go to Settings > Mobile Data and select your SimClaire eSIM as the primary data line. Enable Data Roaming for that profile. Your home SIM stays active for calls and texts simultaneously on dual-SIM devices.

    6. Download offline maps before you leave home

      Open Google Maps and download offline maps for each city on your itinerary while on home Wi-Fi. GPS navigation works without mobile data once maps are cached, saving your eSIM data for bookings, messaging, and real-time needs.

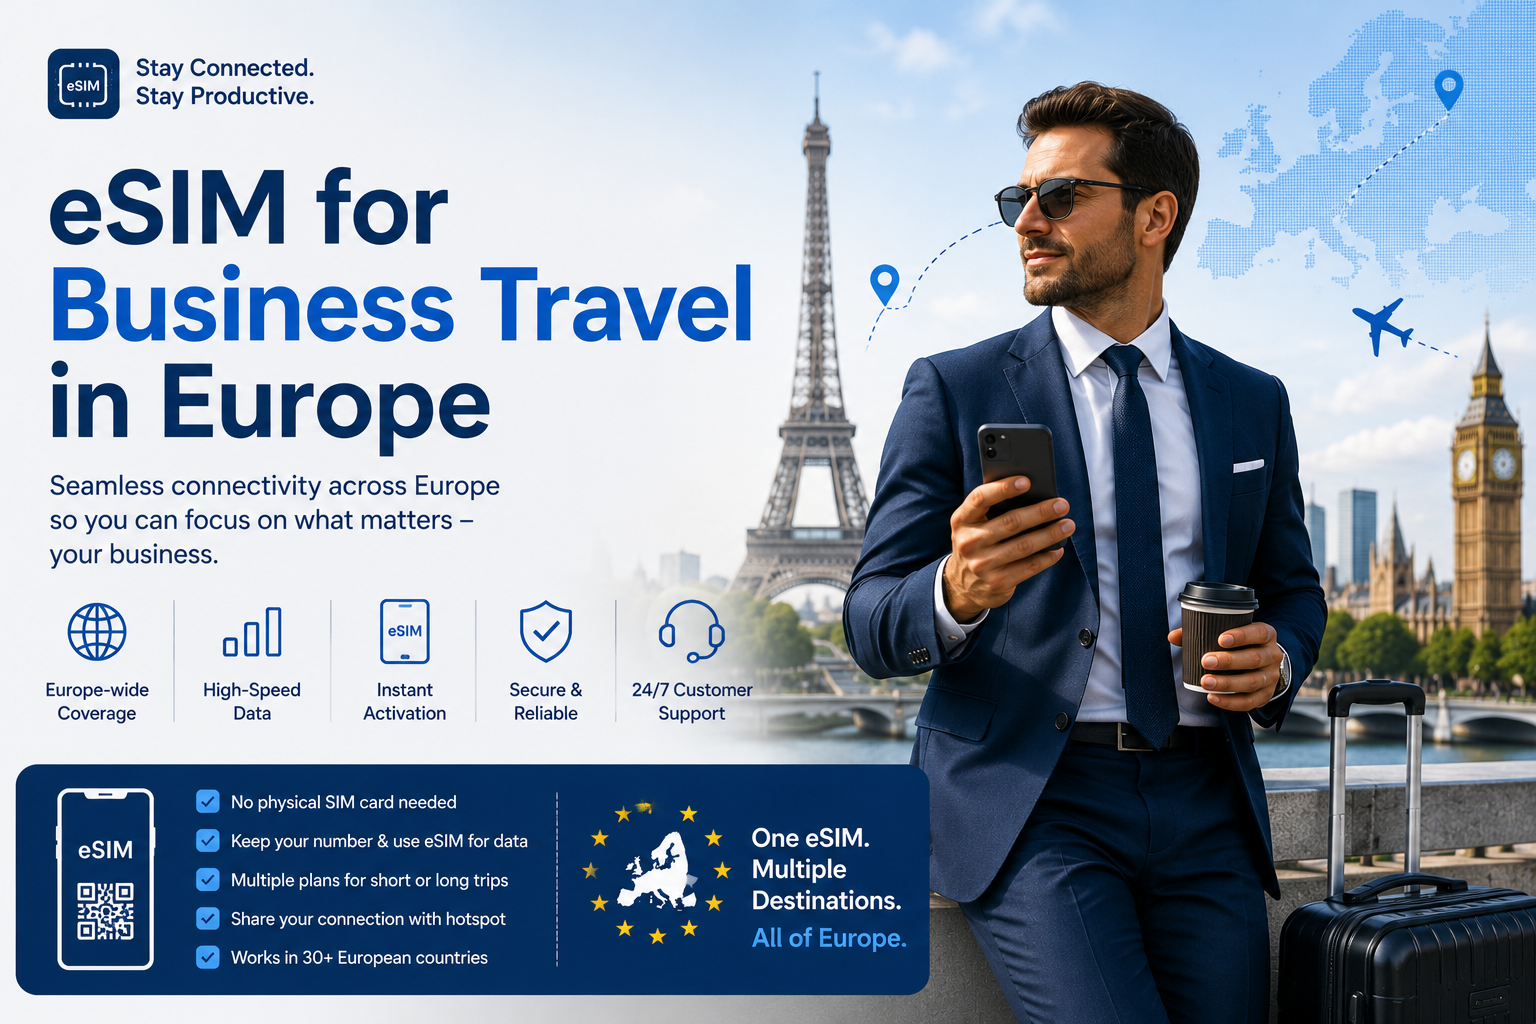
  • eSIM for Business Travel in Europe: What Actually Matters in 2026

    eSIM for Business Travel in Europe: What Actually Matters in 2026

    Picking an eSIM for business travel in Europe is a different exercise from picking one for a holiday. A tourist who loses signal for an hour is mildly inconvenienced. A consultant who cannot dial into a client call from a taxi in Milan, or cannot receive the SMS code that unlocks their corporate VPN, has a real problem with real money attached to it.

    Most travel eSIM plans are built for tourists. They sell data, they sell it cheaply, and they assume you will do everything through WhatsApp. That assumption breaks down fast on a business trip, where you still need to phone a hotel about a late check-in, call a client’s landline, reach a driver waiting at the wrong terminal, and receive one-time passcodes from systems that only send SMS.

    This guide covers what separates a workable eSIM for business travel from a cheap tourist plan: voice and SMS, hotspot support, cross-border coverage, expense documentation, and how much data a working week actually consumes. SimClaire operates as a marketplace, so you can compare plans across providers and filter for the specifications that matter to a working traveller rather than taking whatever the first result offers.


    Quick Answer: What Is the Best eSIM for Business Travel in Europe?

    The best eSIM for business travel in Europe is a regional plan that includes voice minutes and SMS, covers every country on your itinerary, explicitly permits hotspot tethering, and has validity comfortably longer than your trip.

    Data-only plans are cheaper, and they are the wrong choice for most trips. An eSIM for business travel has to do things a holiday plan never has to do. The saving is a few dollars. The cost of not being able to make a phone call during a working week abroad is considerably higher.

    If your trip is a single city and a single country, a country-specific plan usually gives better value and stronger network performance. If you are crossing borders — which most European business itineraries do — a regional plan avoids buying a new eSIM in every market.

    Browse Europe plans →

    Who this guide is for

    • Consultants, salespeople and account managers working across European markets
    • Founders and executives on investor or client roadshows
    • Engineers and technical staff on customer sites abroad
    • Anyone attending trade shows, conferences or industry events in Europe
    • Employees whose company will not approve a €15-per-day roaming add-on

    Why “Roam Like at Home” Makes an eSIM for Business Travel Essential

    There is a widespread assumption that roaming in Europe is solved, and that anyone shopping for an eSIM for business travel is overthinking it. It is solved — but only for people who live there.

    The EU’s Roam Like at Home rules let residents of EU and EEA countries use their domestic minutes, texts and data across the bloc at no extra charge, and the European Parliament confirms these rules run until 2032. The scheme now also covers Ukraine and Moldova as of January 2026.

    None of that applies to a traveller flying in from Canada, the United States, the UK or anywhere else outside the zone. Your home carrier’s European roaming is governed by your own contract, not by EU regulation — which is exactly why a travel eSIM for business trips tends to cost a fraction of what your carrier charges for the same week.

    If you are unsure what your own plan does abroad, our breakdown of how roaming charges actually work walks through the per-day and per-megabyte models carriers use.


    What to Look for in an eSIM for Business Travel

    Voice Minutes and SMS, Not Just Data

    This is the specification that separates a business-grade plan from a tourist one, and it is the one most people discover too late.

    A data-only eSIM cannot dial a regular phone number. On a working trip that means you cannot:

    • Call a client’s office line or a colleague’s desk phone
    • Phone the hotel when your flight lands at midnight and reception has gone quiet
    • Reach a driver, a venue coordinator or a courier
    • Call a bank or card issuer after a transaction gets flagged abroad
    • Receive SMS one-time passcodes from systems that do not support app-based authentication

    WhatsApp and Teams calls cover some of this, but only when the other party is on the same platform. Hotels, taxi dispatchers, receptionists and banks generally are not. Filtering for combo plans that bundle minutes and SMS is the single highest-value decision when choosing an eSIM for business travel.

    Hotspot Support for Your Laptop

    Real work happens on a laptop, so any eSIM for business travel needs to reach one. If your plan does not permit tethering, your laptop is stuck on hotel or venue Wi-Fi — which is congested at conferences, unreliable in older hotels, and a poor idea for anything sensitive. Confirm that hotspot use is explicitly allowed, and check whether tethered data is capped below the headline allowance.

    Regional Coverage Across Every Border

    European business itineraries rarely stay in one country. A Monday in Amsterdam, Wednesday in Frankfurt, Friday in Zurich is an ordinary week — and Switzerland is not in the EU, so it drops out of plenty of “Europe” bundles. Check the country list against your actual calendar, including the UK if London is on it.

    Validity That Outlasts the Trip

    Business trips get extended. A meeting moves, a deal needs another day, a flight gets cancelled. Buy validity with margin rather than matching your itinerary exactly, because topping up mid-trip is more disruptive than paying slightly more upfront.

    Documentation You Can Expense

    You will need to expense this. An eSIM for business travel is a business purchase, and it should produce a business receipt. Check that you receive an itemised receipt or invoice at purchase with the vendor name and amount, and that it arrives at an email address you can access from the road. This sounds trivial until you are reconstructing a expense report six weeks later from a payment confirmation you deleted.


    How Much Data Does an eSIM for Business Travel Need?

    The data an eSIM for business travel needs skews differently from leisure usage: less streaming, far more video calls, email with attachments, cloud file sync, and laptop tethering.

    ActivityTypical ConsumptionNotes
    Video call (Teams, Zoom, Meet)1.5–3 GB per hour at HDThe dominant cost on most business trips
    Voice-only call over data30–50 MB per hourNegligible by comparison
    Email with attachments50–150 MB per dayHigher if your client sends decks
    Cloud sync (OneDrive, Drive, Dropbox)500 MB – 3 GB per dayTurn off automatic sync before you fly
    Navigation and transit apps100–300 MB per dayDownload offline maps to reduce this
    Laptop tethering, general work1–2 GB per dayOn top of phone usage

    Practical guidance by trip length:

    • Two to three days, light usage: 5 GB is usually enough if you avoid tethering.
    • A standard working week: 10–20 GB covers most travellers comfortably.
    • A week with daily video calls and laptop tethering: 30 GB or an unlimited plan.
    • Multi-week assignment: unlimited, or a high-cap plan with top-up available.

    The biggest avoidable drain is background cloud sync. Pausing OneDrive, Google Drive, Dropbox and automatic photo backup before departure routinely halves consumption, and costs you nothing.


    eSIM for Business Travel vs Your Carrier’s Roaming Add-On

    Travel eSIMCarrier roaming pass
    Cost structureFixed prepaid amount, known before departureDaily fee, charged for every day you use it
    Multi-country tripsOne regional plan covers the routeUsually fine, but priced per day regardless
    Your work numberStays active on your home SIM for calls and textsStays active
    Local callingCombo plans include minutes and SMSIncluded, at your domestic rate
    Expense clarityOne receipt, one line itemBuried in a bill that arrives weeks later
    SetupInstall before you flyAutomatic

    Carrier roaming wins on convenience and on keeping your work number fully live. A prepaid travel eSIM wins decisively on cost and on expense clarity — one clean receipt rather than a surcharge you have to explain to finance a month later.

    Most experienced travellers run both: home SIM active for their work number with data roaming switched off, travel eSIM handling all data and local calling. Dual SIM makes this straightforward, and our comparison of eSIMs and physical SIM cards covers the mechanics.


    The One-Time Passcode Problem

    This deserves its own section because it strands people more often than any other connectivity issue, and because no eSIM for business travel fixes it on its own.

    Corporate systems, banks and payment platforms frequently fall back to SMS verification. If your work number is on a home SIM you have switched off to avoid roaming charges, those codes go nowhere. If your travel eSIM is data-only, it has no number capable of receiving them either.

    Three things to do before you fly:

    1. Move corporate MFA to an authenticator app. Microsoft Authenticator, Okta Verify and Google Authenticator generate codes offline, with no network needed at all.
    2. Keep your home SIM enabled for calls and texts with data roaming explicitly disabled. Incoming SMS is typically free or trivially cheap; it is data that generates the bill.
    3. Choose a plan with SMS capability so you have a second working number if the first fails.

    Sorting this out takes ten minutes at your desk and prevents the specific failure mode of being locked out of your own systems in a foreign city.


    Choosing an eSIM for Business Travel by Trip Type

    Single City, Single Country

    A country-specific plan on a major local network gives the best performance and usually the best price. Two to five days of normal usage rarely needs more than 5–10 GB. Voice minutes still matter for hotel and client calls.

    Multi-Country Week

    A regional eSIM for business travel is the obvious choice — buying separate plans for three countries in five days wastes both money and time. Verify every country on your itinerary appears on the coverage list, and watch for non-EU stops like Switzerland, Norway or the UK.

    Trade Shows and Conferences

    Here an eSIM for business travel earns its cost outright. Venue Wi-Fi at large events is reliably terrible, and cellular networks around convention centres get congested during peak hours. Buy more data than you think you need, and treat your own connection as the primary one rather than the backup. If you are demoing anything live, tethering to a phone with a strong local signal beats venue Wi-Fi almost every time.

    Extended Assignments

    For anything over three weeks in a single country, compare an eSIM against a local postpaid or prepaid SIM, which can be cheaper at that duration. The trade-off is administration: local SIMs often require registration, an address, or an in-person visit. For most assignments under two months, an eSIM with a top-up option remains simpler.


    Setting Up an eSIM for Business Travel Before You Fly

    1. Confirm your device supports eSIM. Almost all recent business phones do; Apple’s eSIM setup documentation lists supported models and the installation steps. See our activation walkthrough for a step-by-step version.
    2. Buy and install the profile at home, on stable Wi-Fi, ideally a few days out.
    3. Do not activate yet — validity generally starts at activation, not purchase.
    4. Disable data roaming on your home SIM while leaving calls and texts enabled.
    5. Set the travel line as your default for data and leave your work number as default for voice if you want it reachable.
    6. Pause cloud sync and automatic app updates.
    7. Download offline maps and any documents you will need on arrival.
    8. Save your receipt somewhere your expense system can reach.
    9. Activate on landing and confirm you have signal before leaving the terminal.

    Border Queues and Why You Want Signal on Arrival

    Since April 2026, the EU’s Entry/Exit System has been operating at Schengen external borders, replacing passport stamps with biometric registration. The rollout has produced longer queues at some airports and land crossings, and the European Commission maintains an official page on the EES and ETIAS timeline worth checking before you travel.

    For anyone carrying an eSIM for business travel, the practical implication is simple: arrival can now take considerably longer than it used to, and you may need to message a client, reschedule a car, or tell a colleague you will miss the first half of a meeting — all while standing in a queue on the wrong side of border control. An active connection the moment you land is no longer a nicety.

    ETIAS, the separate travel authorisation for visa-exempt visitors including Canadians, Americans and Britons, is targeted for late 2026 but has been repeatedly delayed and is not yet in force. Check the official EU page rather than any commercial site before your trip, since third-party ETIAS sites are a well-documented scam vector.

    One thing that never depends on your plan: emergency numbers work from any phone with a signal, active plan or not. In Europe that is 112, as the EU’s own travel guidance confirms.


    Common Mistakes When Buying an eSIM for Business Travel

    Buying a data-only plan. The most frequent and most costly error when buying an eSIM for business travel. Calling capability is what turns a tourist plan into a working one.

    Forgetting Switzerland or the UK. Both sit outside the EU and outside plenty of regional bundles, and both appear constantly on business itineraries.

    Leaving cloud sync running. A single large file syncing over cellular can consume a day’s allowance before your first meeting.

    Assuming hotel Wi-Fi is adequate. For a client call it frequently is not, and for anything sensitive it should not be your only option.

    Not checking whether tethering is permitted. If your laptop needs the connection, verify this before purchase, not on arrival.

    Cutting validity too fine. Trips extend. Build in margin.

    Losing the receipt. Trivial to avoid, tedious to fix at expense time.


    Where to Compare an eSIM for Business Travel

    SimClaire is a marketplace rather than a single provider, which matters when your requirements are specific rather than generic. Comparing an eSIM for business travel across providers surfaces the combo plans that price comparison sites bury.

    Filter for what business trips actually need. Voice minutes, SMS, hotspot permission, validity length and country coverage — not just price per gigabyte.

    Combo plans that include calling. The specification most tourist-focused providers do not lead with, and the one that determines whether your trip works.

    Compare across providers. Coverage and pricing vary by country and by duration. Comparing beats defaulting to whichever brand you have heard of.

    Country, regional and global options for single-market trips and multi-city routes alike.

    Buy and install before departure, with a receipt you can file.

    See plans on SimClaire →


    Final Verdict: Choosing the Right eSIM for Business Travel

    For most European trips, the right eSIM for business travel is: a regional plan including voice minutes and SMS, with confirmed hotspot support and validity longer than your itinerary.

    For a single-city trip: a country-specific plan on a major local network, 5–10 GB, with calling included.

    For a week of client meetings and video calls: 30 GB or unlimited, hotspot enabled.

    For conferences and trade shows: more data than you estimate, treated as your primary connection rather than a backup.

    For assignments over a month: compare against a local SIM, but weigh the registration friction.

    The decision that matters most is not price. It is whether the plan can make a phone call. Everything else on a business trip has a workaround; that one does not.


    Frequently Asked Questions

    When should I install and activate the plan?

    Install at home on stable Wi-Fi a few days before departure, then activate on landing. Validity typically starts at activation rather than purchase, so early installation costs nothing.

    Can I keep my work number active while using a travel plan?

    Yes. Dual SIM lets your home line stay active for incoming calls and texts to your work number while the travel line handles all data. Switch data roaming off on the home line to avoid charges.

    Should I use an eSIM or a local SIM card for a long assignment?

    For stays beyond roughly two months in one country, a local SIM can be cheaper. Below that, an eSIM is simpler — no registration paperwork, no in-person visit, and you can install it before you leave.

    Can I tether my work laptop to an eSIM?

    Yes, provided the plan explicitly permits hotspot use. Some plans allow tethering but apply a lower cap to tethered data, so confirm both before purchasing.

    Does EU roaming regulation cover travellers from outside Europe?

    No. Roam Like at Home applies to residents of EU and EEA countries. Visitors from Canada, the US, the UK and elsewhere are governed by their own carrier’s international terms, which is why a local travel plan is typically far cheaper.

    Is a travel eSIM cheaper than my carrier’s roaming pass?

    Usually, and often substantially, because carrier passes charge a daily fee for every day of the trip. A prepaid plan is also a single clean line item for expenses rather than a surcharge buried in a bill that arrives weeks later.

    How much data does a business trip to Europe need?

    Roughly 5 GB for two or three light days, 10–20 GB for a standard working week, and 30 GB or unlimited if you have daily video calls or tether a laptop. Video conferencing is the dominant consumer at 1.5–3 GB per hour.

    Will I still receive work SMS codes while abroad?

    Only if the number those codes are sent to is reachable. Keep your home SIM enabled for calls and texts with data roaming switched off, and move corporate multi-factor authentication to an authenticator app before you travel — those generate codes with no network connection at all.

    Can I make normal phone calls with a travel eSIM?

    Only if the plan includes voice minutes. Most travel eSIMs are data-only, which means calls work through WhatsApp, Teams or FaceTime but cannot reach a regular phone number. Look specifically for combo plans that bundle minutes and SMS.

    What is the best eSIM for business travel in Europe?

    The best option is a regional plan that includes voice minutes and SMS, covers every country on your itinerary, permits hotspot tethering, and has validity longer than your trip. Data-only plans are cheaper but leave you unable to phone hotels, clients or drivers.

  • Best eSIM for Students Traveling Abroad (2026 Guide)

    Best eSIM for Students Traveling Abroad (2026 Guide)

    The best eSIM for students traveling abroad depends on where you’re studying, how much data you need, and whether you plan to visit multiple countries. Whether you’re spending a semester in Europe, studying in the USA, joining an exchange program in Japan, or backpacking through Southeast Asia after exams, having reliable mobile data makes it easier to navigate, attend online classes, communicate with family, and manage everyday life abroad.

    That’s why more students are switching to travel eSIMs instead of paying expensive international roaming charges or searching for local SIM cards at the airport.

    But not every eSIM is built with students in mind.

    Some plans are inexpensive but offer very little data. Others include generous allowances but only work in a single country, making them unsuitable if you’re traveling across Europe or visiting neighboring countries during weekends or semester breaks.

    This guide compares the best eSIMs for students traveling abroad, explains what features actually matter, and helps you choose the right plan based on your destination, budget, and length of stay.

    If you’re looking for an affordable option that works across multiple countries with transparent pricing and quick activation, SimClaire is one of the providers worth considering.

    Why Students Need an eSIM Instead of International Roaming

    Studying abroad is already expensive. Accommodation, tuition, transport, insurance, and everyday expenses quickly add up. Paying high roaming charges simply to use Google Maps or message your family shouldn’t be another surprise expense.

    A travel eSIM solves several common problems students face.

    Stay connected from the moment you land

    Rather than searching for a mobile store after a long flight, you can install your eSIM before departure and activate it as soon as you arrive. Your phone connects automatically to a supported local network, letting you book transport, contact your host, or navigate to your accommodation immediately.

    Avoid expensive roaming charges

    International roaming offered by home carriers is often one of the most expensive ways to stay connected abroad. Travel eSIMs provide prepaid data plans, allowing you to know exactly how much you’ll spend before your trip begins.

    Perfect for weekend trips

    Many students don’t stay in one country.

    A semester in France often includes weekend trips to Italy, Spain, Germany, Belgium, or the Netherlands.

    Choosing a regional or multi-country eSIM means you don’t need to purchase a new SIM every time you cross a border.

    Quick installation

    Most travel eSIMs can be installed in just a few minutes using a QR code sent by email.

    There are no physical SIM cards to collect, swap, or risk losing during your trip.

    What Students Should Look for Before Buying an eSIM

    Not every traveler has the same connectivity needs.

    Someone attending a one-week summer program doesn’t need the same data plan as a student spending an entire academic year overseas.

    Before purchasing an eSIM, consider these factors.

    1. Coverage

    The first question isn’t “How much data?”

    It’s “Where will I be traveling?”

    Choose an eSIM that supports every country on your itinerary.

    For example:

    • Studying in Germany while visiting France and Italy
    • Exchange semester in Japan with trips to South Korea
    • University program in the USA followed by travel through Canada
    • Southeast Asia backpacking after graduation

    Buying one regional eSIM is often simpler than purchasing separate country plans.

    2. Data Allowance

    Students rely heavily on mobile data throughout the day.

    Common activities include:

    • Google Maps
    • WhatsApp
    • Microsoft Teams
    • Zoom
    • Google Meet
    • Spotify
    • Instagram
    • TikTok
    • YouTube
    • Cloud storage
    • Food delivery apps
    • Ride-hailing apps

    Choosing the cheapest plan isn’t always the best decision if it means constantly worrying about running out of data.

    3. Validity Period

    Match your plan with your stay.

    Trip DurationRecommended Plan
    1 week5–10 GB
    2 weeks10–20 GB
    1 month20–30 GB
    Semester (3–6 months)Monthly renewable plan
    Full academic yearLong-term or renewable regional plans

    4. Multi-country Support

    If you’re studying in Europe, don’t only compare “France eSIM” plans.

    Instead, check whether the provider offers a Europe-wide plan covering dozens of countries under one eSIM.

    This saves both money and time during holidays and weekend trips.

    5. Hotspot Support

    Many students carry laptops and tablets.

    Being able to share your phone’s internet connection is valuable when:

    • University Wi-Fi is unavailable
    • You’re studying in a café
    • You’re on a train
    • You’re attending online lectures
    • You’re working remotely

    Always confirm that hotspot and tethering are supported before purchasing.

    6. Easy Activation

    The best providers let you:

    • Purchase online
    • Receive the QR code instantly
    • Install before departure
    • Activate automatically upon arrival

    The fewer setup steps, the better.

    How Much Data Does a Student Actually Need?

    One of the biggest questions students ask is:

    “How many GB do I really need?”

    The answer depends on how you use your phone.

    Here’s a rough estimate for one month.

    ActivityApproximate Data Usage
    WhatsApp messagesVery Low
    Google Maps3 to 5 GB
    Music streaming4 to 8 GB
    Instagram & TikTok15 to 40 GB
    YouTube (1080p)20 to 60 GB
    Zoom / Google Meet20 to 70 GB
    Cloud backupsHigh

    Recommendations

    Light users

    Mostly messaging, maps, emails, and occasional browsing.

    Recommended:

    • 10 GB per month

    Average students

    Daily social media, navigation, university portals, music streaming, and occasional video calls.

    Recommended:

    • 20–30 GB per month

    Heavy users

    Online classes, HD streaming, hotspot use, cloud storage, and frequent video calls.

    Recommended:

    • 40 GB or more per month

    Looking for the Right Student eSIM?

    The best eSIM isn’t always the cheapest one. Students should balance coverage, data allowance, validity, and ease of use to avoid unexpected costs while abroad.

    In the next section, we’ll compare SimClaire with popular travel eSIM providers like Airalo, Holafly, Nomad, and Saily, looking at pricing, coverage, flexibility, and which option offers the best value for students studying overseas.

    Why SimClaire is a Smart Choice for Students Studying Abroad

    Choosing the right eSIM isn’t just about finding the cheapest plan. As a student, you need a provider that keeps you connected throughout your journey, whether you’re attending lectures, navigating a new city, joining video calls with family, or exploring neighboring countries during semester breaks.

    SimClaire is designed for travelers who want reliable connectivity without the hassle of buying local SIM cards every time they cross a border.

    Multi-country Coverage

    Many students travel beyond their study destination.

    You might spend a semester in Germany and visit France, Italy, Austria, and the Netherlands during weekends. Or perhaps you’re studying in Canada while planning a road trip across the USA.

    With SimClaire, you can choose regional and multi-country eSIM plans that help you stay connected without purchasing a new SIM card for every country.


    Affordable Plans for Every Budget

    Student budgets are limited.

    Instead of paying expensive roaming charges or airport SIM card prices, SimClaire offers prepaid travel eSIM plans that let you know exactly how much you’ll spend before your trip begins.

    Whether you need:

    • A small data package for occasional browsing
    • A monthly plan for everyday university life
    • A higher-data option for streaming and online classes

    there’s a plan suited to different travel styles and budgets.


    Instant Digital Delivery

    There’s no need to wait for a physical SIM card.

    After completing your purchase, your eSIM is delivered digitally by email along with simple installation instructions and a QR code.

    You can install it before leaving home and activate it when you arrive at your destination.


    Easy Installation

    Getting started only takes a few minutes.

    Step 1

    Choose your destination and select the plan that best matches your trip.

    Step 2

    Complete your purchase and receive your QR code instantly.

    Step 3

    Install the eSIM while connected to Wi-Fi, then activate it when you arrive.

    No waiting in airport queues.

    No physical SIM cards.

    No complicated setup.


    Which SimClaire Plan is Best for Students?

    The ideal plan depends on how you use your phone.

    Student TypeRecommended Plan
    Light User5–10 GB
    Everyday Student20–30 GB
    Heavy Social Media User30–50 GB
    Online Classes & Hotspot40 GB+
    Multi-country TravelRegional eSIM

    If you’re unsure, choosing a plan with a little more data is often better than running out during an important lecture or while navigating an unfamiliar city.


    Frequently Asked Questions

    Is an eSIM better than buying a local SIM card?

    For many students, yes.

    A travel eSIM can be installed before departure, activates quickly upon arrival, and eliminates the need to visit local mobile stores or swap physical SIM cards.


    Can I keep my WhatsApp number?

    Yes.

    WhatsApp remains linked to your existing phone number. Installing an eSIM for mobile data won’t change your WhatsApp account.


    Can I receive OTPs and verification codes?

    Yes.

    If your primary SIM remains active, you can continue receiving SMS verification codes and banking OTPs while using your travel eSIM for internet access.


    Can I use my phone as a hotspot?

    Many SimClaire plans support hotspot and tethering, allowing you to share your connection with a laptop or tablet. Check the plan details before purchasing to confirm support.


    Should I install my eSIM before flying?

    Yes.

    Installing your eSIM while you have a stable Wi-Fi connection at home makes activation much easier. Once you land, simply enable the eSIM and connect to a supported network.


    Do I need a different eSIM for every country?

    Not necessarily.

    If you’re visiting multiple destinations, a regional or multi-country eSIM may cover your entire trip, making it more convenient than purchasing separate country plans.


    Final Thoughts

    Studying abroad is one of the most exciting experiences you’ll have. Staying connected shouldn’t be another thing to worry about.

    Whether you’re finding your way around campus, attending online classes, booking weekend trips, or keeping in touch with family back home, a reliable travel eSIM makes life significantly easier.

    The best eSIM for students depends on your destination, trip duration, and expected data usage. Compare coverage, pricing, and flexibility before making a decision.

    If you’re looking for an affordable travel eSIM with straightforward prepaid plans, multi-country coverage, and quick digital activation, SimClaire is worth considering for your next study abroad adventure.

    Ready to Stay Connected?

    Explore SimClaire’s travel eSIM plans and choose the one that matches your destination and study schedule.

    • Browse destination eSIMs
    • Check device compatibility
    • Learn how to install your eSIM
    • Compare regional and global plans

    Start your journey connected, so you can focus on learning, exploring, and making the most of your time abroad.


    What is the best eSIM for students traveling abroad?

    The best eSIM depends on your destination, trip length, and data usage. Students should look for wide coverage, affordable pricing, easy activation, and flexible data plans. If you’re traveling to multiple countries, choose a regional or global eSIM instead of buying separate plans for each destination.

    Is an eSIM cheaper than international roaming?

    In most cases, yes. Travel eSIMs offer prepaid data plans with transparent pricing, helping students avoid expensive roaming charges from their home mobile carrier. You pay only for the data you need before your trip begins.

    Can I keep my physical SIM while using an eSIM?

    Yes. Most modern smartphones support Dual SIM functionality, allowing you to keep your physical SIM active for calls and SMS while using an eSIM for mobile data. This lets you continue receiving banking OTPs and verification messages.

    Can I use the same eSIM in multiple countries?

    Yes, if you purchase a regional or global eSIM. These plans cover multiple countries under one eSIM, making them ideal for students traveling during semester breaks or exchange programs.

    How much data does a student need while studying abroad?

    Light users generally need around 10 GB per month. Students who frequently use maps, social media, music streaming, and video calls should consider 20 to 30 GB. Heavy users attending online classes or using hotspots may require 40 GB or more.

    Does WhatsApp work with an eSIM?

    Yes. WhatsApp remains linked to your phone number, not your SIM card. Installing a travel eSIM for mobile data will not affect your WhatsApp account or chats.

    Should I install my eSIM before I travel?

    Yes. Installing your eSIM before departure while connected to a reliable Wi-Fi network makes activation easier. Once you arrive, simply enable the eSIM and connect to a supported local network.

    How do I know if my phone supports eSIM?

    Most recent iPhone, Samsung Galaxy, Google Pixel, and many flagship Android devices support eSIM technology. You can also check your phone’s settings or use SimClaire’s device compatibility page before purchasing.

    How to Buy and Activate a Student eSIM

    1. Choose your destination and estimate how much mobile data you’ll need during your trip.

    2. Select a travel eSIM plan that matches your destination and trip duration.

    3. Complete your purchase online and receive your eSIM QR code by email.

    4. Install the eSIM while connected to Wi-Fi before you travel.

    5. After arriving at your destination, enable the eSIM and mobile data to connect to a supported local network.

    6. Enjoy reliable internet for navigation, communication, online classes, and everyday travel.